

ElasticSearch完整入门及springboot集成
目录
- ElasticSearch概述
- ElasticSearch版本特性
- Elasticsearch 5
- Elasticsearch 6.0
- Elasticsearch 7.0
- Elasticsearch 8.0
- ElasticSearch安装
- Windows
- linux
- Kibana安装
- Windows
- linux
- 使用
- IK分词器(elasticsearch插件)
- 安装
- 自定义的词典
- ES的基本使用
- 字段数据类型
- 索引操作
- 文档操作
- 创建文档
- 查看文档
- 修改文档
- 删除文档
- 复杂查询
- 查询匹配(匹配、过滤、排序、分页)
- 多条件查询(must、should、filter)
- match和term查询
- wildcard查询
- 高亮查询
- SpringBoot整合ES
- 参考链接
ElasticSearch概述
Elaticsearch,简称为es,es是一个开源的高扩展的分布式全文检索引擎,它可以近乎实时的存储、检索数据;本身扩展性很好,可以扩展到上百台服务器,处理PB级别(大数据时代)的数据。es也使用java开发并使用Lucene作为其核心来实现所有索引和搜索的功能,但是它的目的是通过简单的RESTful API来隐藏Lucene的复杂性,从而让全文搜索变得简单。
(图片来源网络,侵删)据国际权威的数据库产品评测机构DB Engines的统计,在2016年1月,ElasticSearch已超过Solr等,成为排名第一的搜索引擎类应用。
ElasticSearch版本特性
tip:es的版本7x和8x差别很大,安装和使用也存在差异,本文针对的7x版本的,强烈建议学习使用7x版本的
Elasticsearch 5
首先说明下,ES是从版本2直接跳到5的,主要是为了和Elastic Stack其他组件保持版本一致
ES5,在现在来说是比较老的版本了,就不多介绍了
建议大家使用ES7
Elasticsearch 6.0
-
移除type,在 6.0 里面,开始不支持一个 index 里面存在多个 type 了,所有的新的 index 都将只有一个虚拟的固定的 type: doc 来代替
(图片来源网络,侵删) -
稀疏性 Doc Values 的支持, es 的 doc values 是列式存储,文档的原始值都是存放在 doc values 里面的,优化了一个文档有的字段其他文档的持有开销
-
Index sorting,即在索引阶段的排序支持,索引的时候会要增加额外开销,适合不怎么变化的索引的场景。
-
已经关闭的索引将也支持 replica 的自动处理,确保数据可靠
-
Load aware shard routing, 基于负载的请求路由,目前的搜索请求是全节点轮询,那么性能最慢的节点往往会造成整体的延迟增加,新的实现方式将基于队列的耗费时间自动调节队列长度,负载高的节点的队列长度将减少,让其他节点分摊更多的压力,搜索和索引都将基于这种机制。
-
顺序号的支持,每个 es 的操作都有一个顺序编号(类似增量设计)无缝滚动升级
Elasticsearch 7.0
-
ES 数据库的存储结构变化:去除了Type,包括API层面
(图片来源网络,侵删) -
默认配置变化:默认节点名称为主机名,默认分片数为1,不再是5
-
查询相关速度优化:Weak-AND算法。又称为Wand算法, 输入是n个倒排队列,输出top K个得分最高的文档doc,weak-and算法通过计算每个词的贡献上限来估计文档的相关性上限,从而建立一个阈值对倒排中的结果进行减枝,从而得到提速的效果。
-
彻底废除 _all 字段的支持,为提升性能默认不在支持全文检索
-
集群连接变化:TransportClient被废弃,对于java编程,建议采用 High-level-rest-client 的方式
-
ES程序包默认打包jdk:以至于7.x版本的程序包大小突然边300MB+
-
间隔查询(Intervals queries),Elasticsearch 7.0中的间隔查询引入了一种构建“单词或短语彼此相距一定距离的记录查询”的需要的全新方式,与之前的方法(跨度查询span queries)相比,使用和定义更加简单。
-
函数分数 2.0,通过新的模块化结构,用户能够混合和匹配一组算术和距离函数,从而构建任意的函数分数计算方式,进而在更大程度上控制结果的评分和排名方式。
-
引入新的集群协调子系统,移除 minimum_master_nodes 参数,让 Elasticsearch 自己选择可以形成仲裁的节点。
-
典型的主节点选举现在只需要很短的时间就可以完成。集群的伸缩变得更安全、更容易,并且可能造成丢失数据的系统配置选项更少了。 节点更清楚地记录它们的状态,有助于诊断为什么它们不能加入集群或为什么无法选举出主节点。
-
不再内存溢出,新的 Circuit Breaker 在JVM 堆栈层面监测内存使用,Elasticsearch 比之前更加健壮。设置indices.breaker.fielddata.limit的默认值已从JVM堆大小的60%降低到40%。
-
支持达到纳秒级精度,强化时序型用例
-
支持达到纳秒级精度,强化时序型用例
-
Lucene9.0的支持
-
7.1开始,Security功能免费使用
Elasticsearch 8.0
Elasticsearch 8.0 版通过改进 Elasticsearch 的矢量搜索功能、对现代自然语言处理模型的原生支持、不断简化的数据上线过程,以及精简的安全防护体验,在速度、扩展幅度、相关性和简便性方面,迎来了一个全新的时代。需要 Java 17 才能运行 Elasticsearch。
Elasticsearch 8.0 版是基于 Lucene 9.0 开发的,那些利用现代 NLP 的搜索体验,都可以借助(新增的)对近似最近邻搜索的原生支持,快速且大规模地实现。通过 ANN,可以快速并高效地将基于矢量的查询与基于矢量的文档语料库(无论是小语料库、大语料库还是巨型语料库)进行比较。
重要更新
- Rest API相比较7.x而言做了比较大的改动(比如彻底删除_type),为了降低用户的升级成本,8.x会暂时的兼容7.x的请求。
- 默认开启安全配置(三层安全),并极大简化了开启安全需要的工作量,可以这么说:7.x开启安全需要10步复杂的步骤比如CA、证书签发、yml添加多个配置等等,8.x只需要一步即可)。
- 存储空间优化:更新了倒排索引,对倒排文件使用新的编码集,对于keyword、match_only_text、text类型字段有效,有3.5%的空间优化提升,对于新建索引和segment自动生效。
- 优化geo_point,geo_shape类型的索引(写入)效率:15%的提升。
- 新特性:支持上传pyTorch模型,在ingest的时候使用。比如在写入电影评论的时候,如果我们想要知道这个评论的感情正负得分,可以使用对应的AI感情模型对评论进行运算,将结果一并保存在ES中。
- 技术预览版KNN API发布,(K邻近算法),跟推荐系统、自然语言排名相关。之前的KNN是精确搜索,在大数据集合的情况会比较慢,新的KNN提供近似KNN搜索,以提高速度。
- 对ES内置索引的保护加强了:elastic用户默认只能读,如果需要写权限的时候,需有allow_restrict_access权限
ElasticSearch安装
Kibana是ElasticSearch的可视化工具,建议下载7.X版本的,8.x版本改动很多,学习成本很大,这篇文章也是针对7.x版本的
Windows
需要注意的的elasticsearch和kibana版本要一致
下载地址:https://www.elastic.co/cn/downloads/elasticsearch

解压即可
kibana下载地址:https://www.elastic.co/cn/downloads/kibana
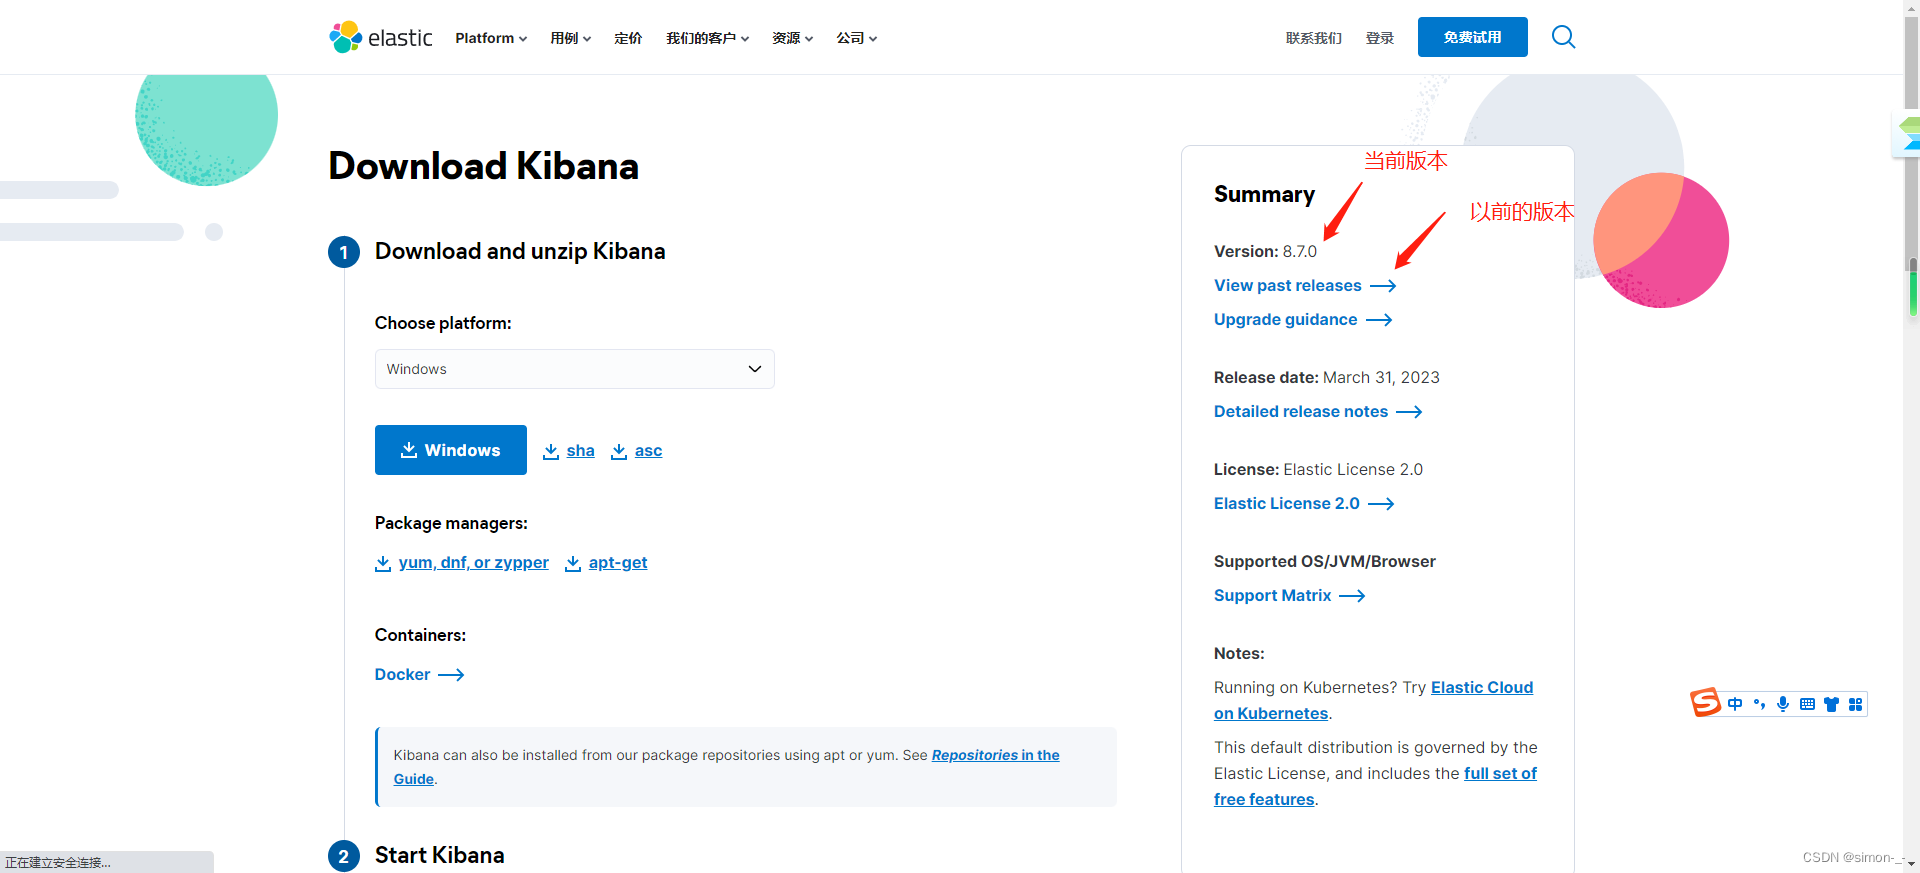
也是解压就行
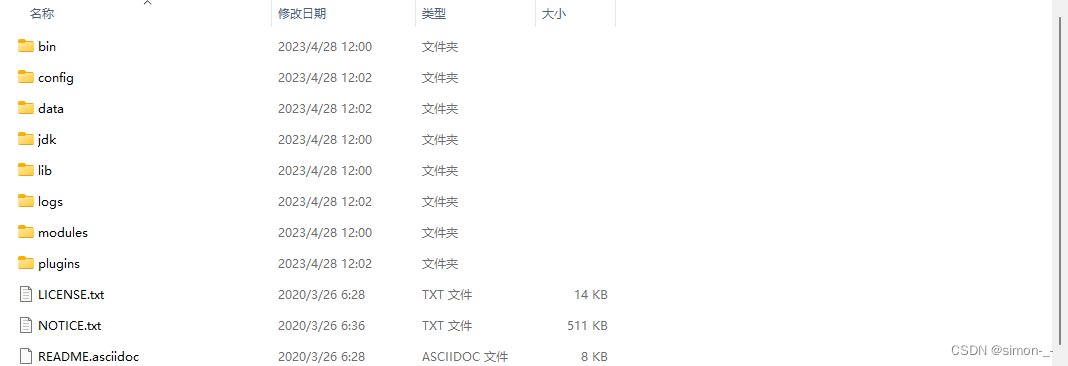
bin 启动文件目录
config 配置文件目录
    1og4j2 日志配置文件
    jvm.options java 虚拟机相关的配置(默认启动占1g内存,内容不够需要自己调整)
    elasticsearch.ym1 elasticsearch 的配置文件! 默认9200端口!跨域!
1ib
    相关jar包
modules 功能模块目录
plugins 插件目录
    ik分词器
运行与访问
双击elasticsearch.bat运行即可
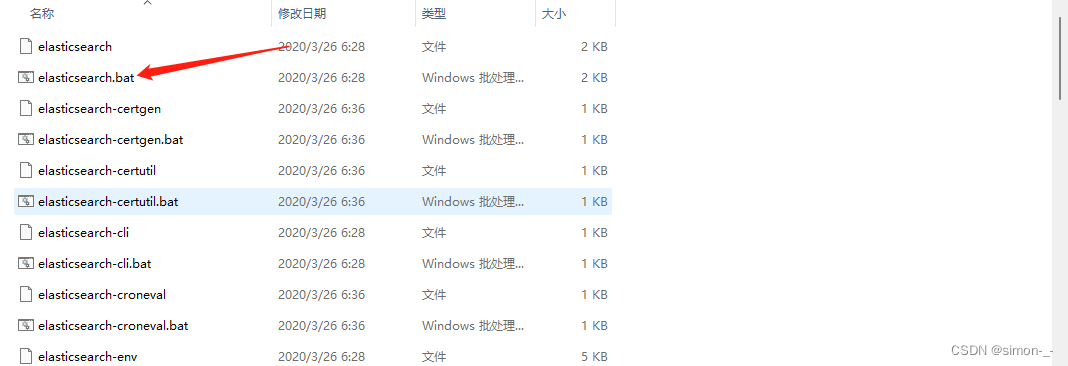
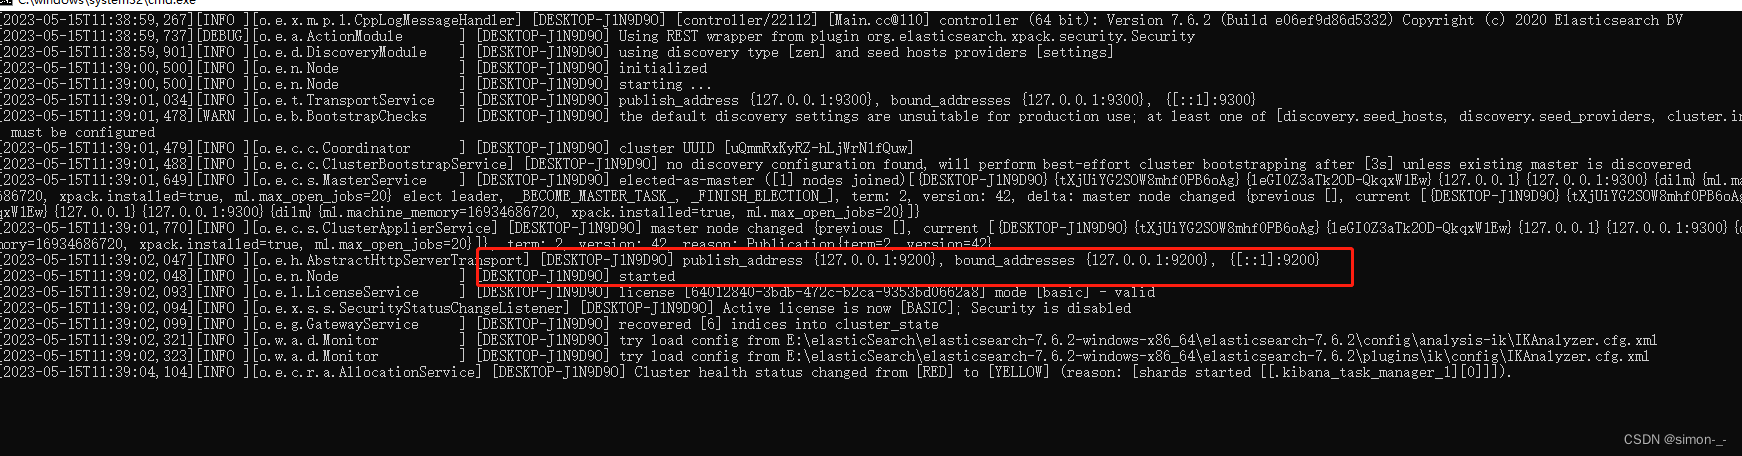
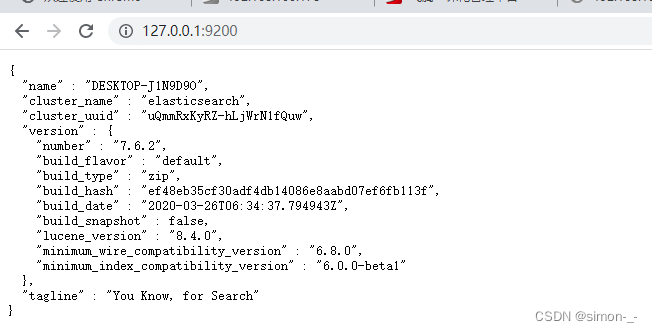
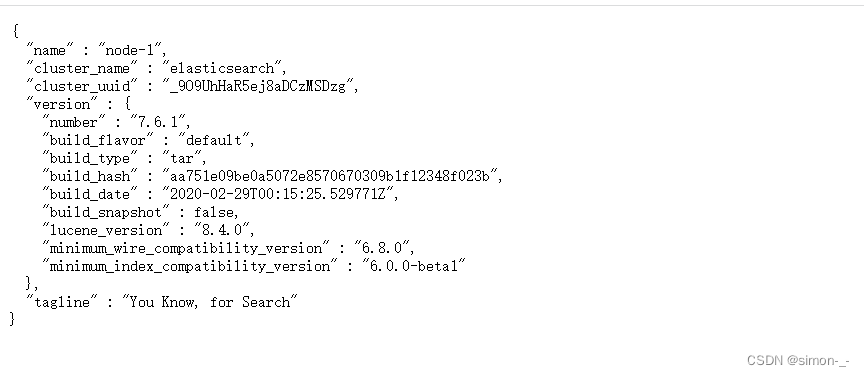
访问
http://127.0.0.1:9200/
linux
centos7安装es可以有多种方式,下面演示的是通过wget方式下载
安装wget命令
yum -y install wget
wget命令下载es到指定目录
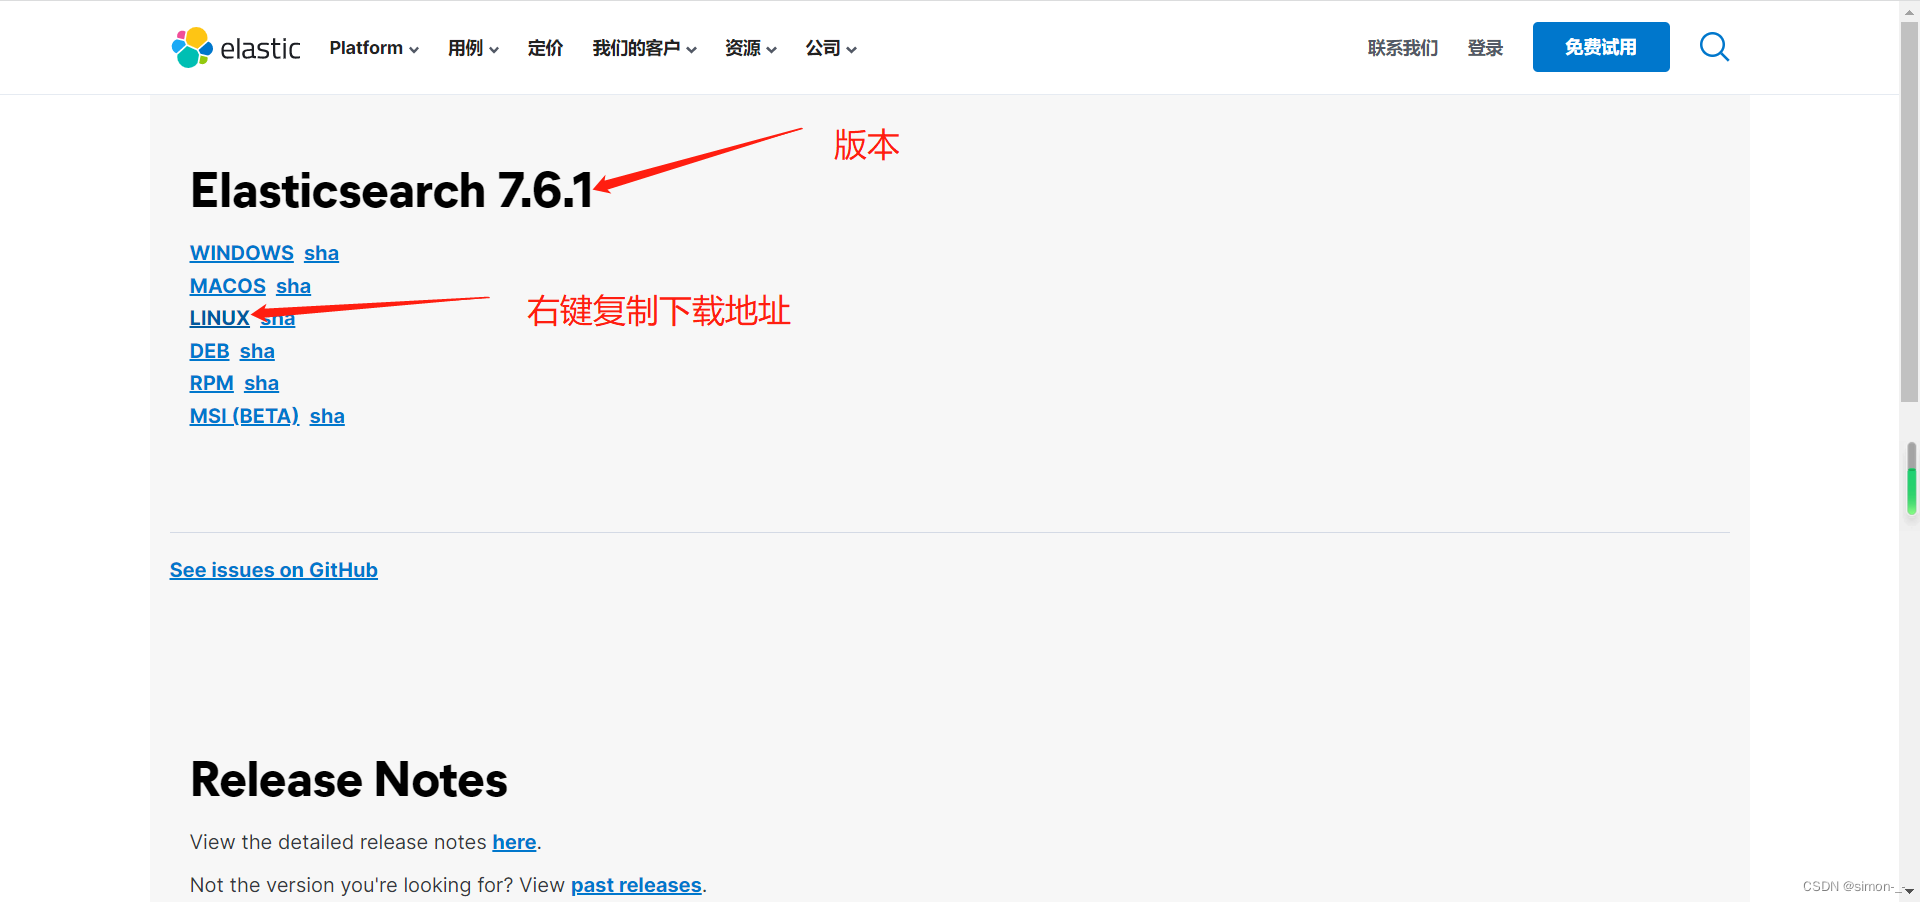
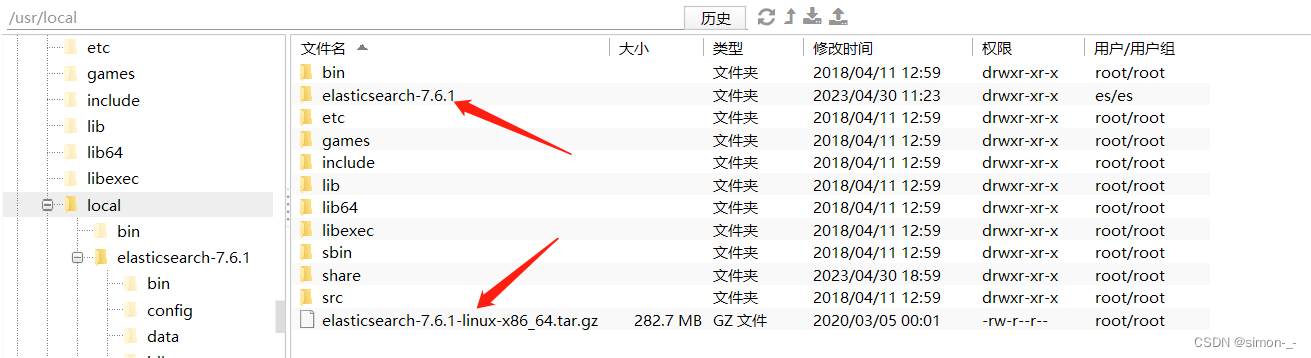
##es的安装目录
cd /usr/local
## 下载es压缩包
wget https://artifacts.elastic.co/downloads/elasticsearch/elasticsearch-7.6.1-linux-x86_64.tar.gz
##解压
tar -zxvf elasticsearch-7.6.1-linux-x86_64.tar.gz
上面es的下载地址可以去官网复制
下载并解压成功
配置并启动
新建data目录存放es数据
mkdir /usr/local/elasticsearch-7.6.1/data
修改config/elasticsearch.yml,
vi elasticsearch-7.6.1/config/elasticsearch.yml
在文件最后面加入以下内容,esc后:wq退出并保存
#设置绑定的ip,设置为0.0.0.0以后就可以让任何计算机节点访问到了
network.host: 0.0.0.0
http.port: 9200 #端口
#数据和日志的存储目录
path.data: /usr/local/elasticsearch-7.6.1/data
path.logs: /usr/local/elasticsearch-7.6.1/logs
#设置在集群中的所有节点名称,默认节点是node-1
node.name: node-1
#discovery.seed_host: [192.168.0.116]
cluster.initial_master_nodes: ["node-1"]
ES从5.几之后便不能用root用户进行启动了所以必须要建一个用户。用新用户连接并启用es才行
添加es新用户
adduser es
为es用户设置密码
passwd es
输入新的密码和确认密码
修改es目录所属用户
chown es /usr/local/elasticsearch-7.6.1 -R
chown -R es:es /usr/local/elasticsearch-7.6.1
vi 编辑 /etc/security/limits.conf
vi /etc/security/limits.conf
在末尾加上
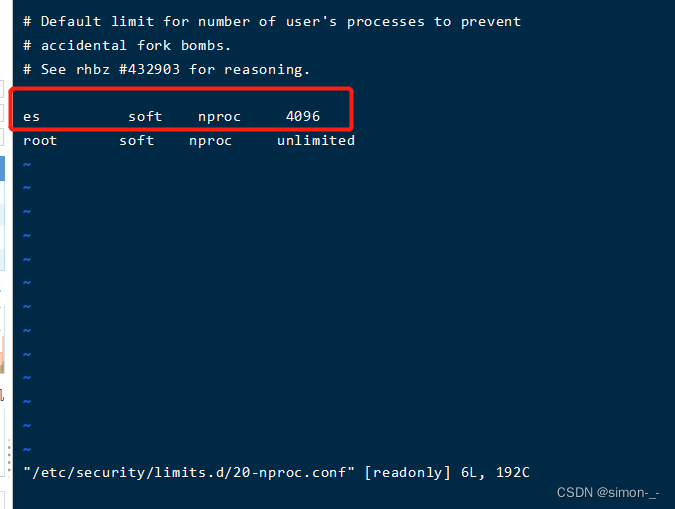
es soft nofile 65536
es hard nofile 65536
es soft nproc 4096
es hard nproc 4096
vi 编辑 vi /etc/security/limits.d/20-nproc.conf,将* 改为用户名(es)
vi /etc/security/limits.d/20-nproc.conf
查询上面的配置是否生效
加了上面修改后需要重新连接服务器才能生效,新建ssh连接后执行命令
ulimit -a
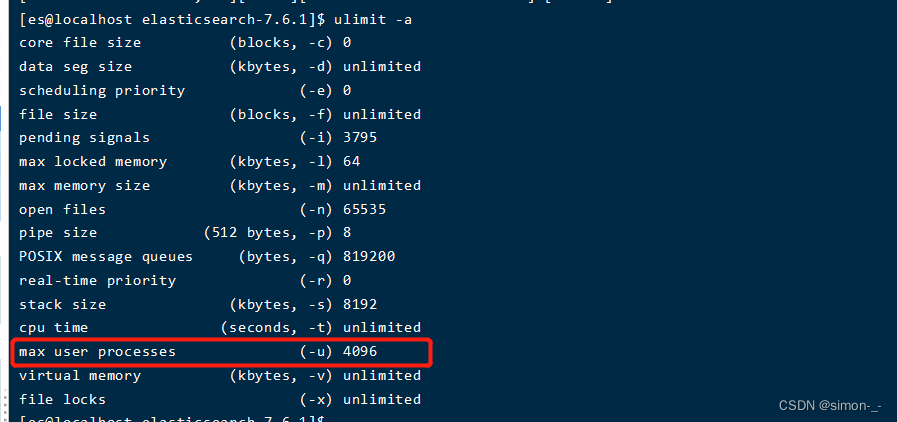
如上变成4096说明配置生效
vi 编辑 /etc/sysctl.conf,在末尾加上:
vm.max_map_count = 655360
执行下面命令,使sysctl.conf配置文件生效
sysctl -p
开放es端口
##开放9200端口
firewall-cmd --permanent --zone=public --add-port=9200/tcp
##重启防火墙
systemctl reload firewalld
##查看开放的端口
firewall-cmd --list-ports
切换es用户启动es
##前台启动
/usr/local/elasticsearch-7.6.1/bin/elasticsearch
##后台启动
/usr/local/elasticsearch-7.6.1/bin/elasticsearch -d
关闭es,先查询es的进程号再用kill命令强制关闭
ps -ef|grep elasticsearch
启动成功访问 http://ip:9200/
Kibana安装
Windows
Kibana和es一样也是下载解压运行就行
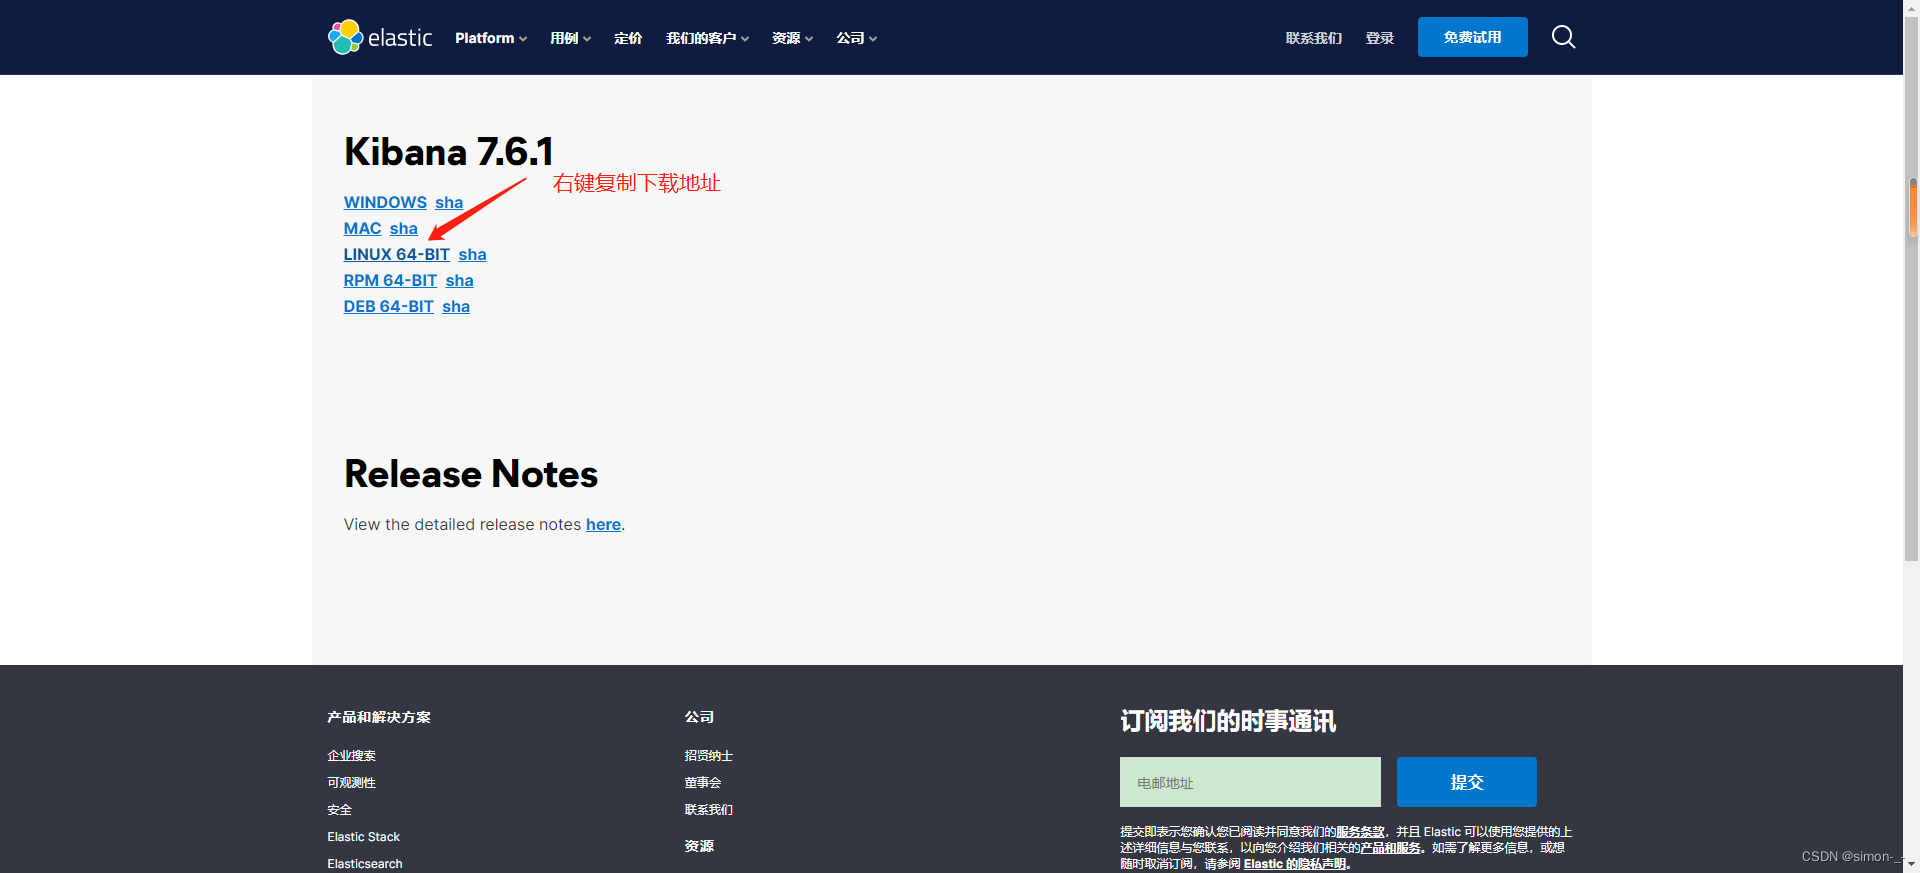
下载的版本需要与ElasticSearch版本对应
下载地址:https://www.elastic.co/cn/downloads/past-releases/kibana-7-6-1
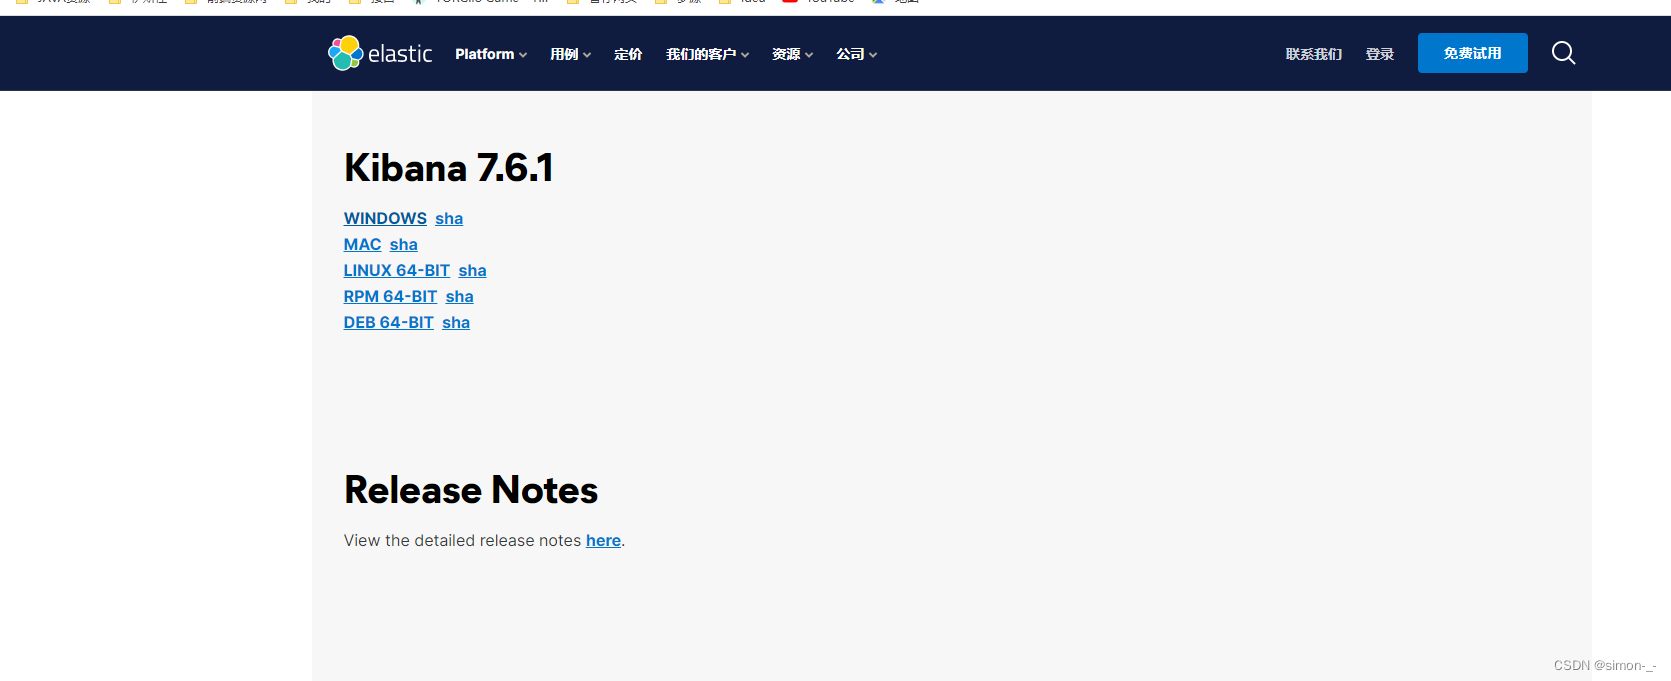
下载解压即可
汉化
编辑器打开kibana解压目录/config/kibana.yml,添加
i18n.locale: "zh-CN"
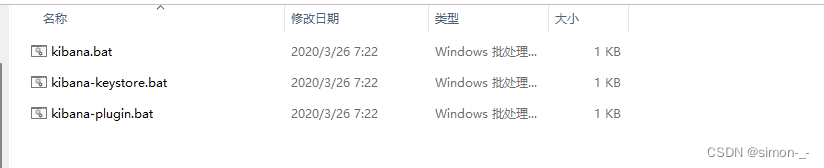
双击bin目录的kibana.bat就行
访问
http://127.0.0.1:5601/

linux
wget命令下载kibana到指定目录
##es的安装目录
cd /usr/local
## 下载es压缩包
wget https://artifacts.elastic.co/downloads/kibana/kibana-7.6.1-linux-x86_64.tar.gz
##解压
tar -zxvf kibana-7.6.1-linux-x86_64.tar.gz
上面kibana的下载地址可以去官网复制
配置
修改kibana的config目录里面的kibana.yml文件,在文件最后面加
#配置端口号
server.port: 5601
#配置网络访问地址
server.host: "0.0.0.0"
#配置es链接地址(es集群,可以用逗号分隔),ip设置你的服务器ip
elasticsearch.hosts: ["http://192.168.100.110:9200"]
#配置中文语言界面
i18n.locale: "zh-CN"
修改目录权限
将kibana的目录权限改为es用户的,如果还没添加es用户可以去elasticsearch的linux安装中按步骤添加es用户
chown -R es:es /usr/local/kibana-7.6.1-linux-x86_64
开放kibana端口
##开放5601端口
firewall-cmd --permanent --zone=public --add-port=5601/tcp
##重启防火墙
systemctl reload firewalld
##查看开放的端口
firewall-cmd --list-ports
启动
注意必须使用普通用户启动服务 root用户启动会报错,并且elasticsearch必须先启动
切换es用户启动
#前台启动
/usr/local/kibana-7.6.1-linux-x86_64/bin/kibana
#后台启动
nohup /usr/local/kibana-7.6.1-linux-x86_64/bin/kibana >/usr/local/kibana-7.6.1-linux-x86_64/kiban.log 2>&1 &
访问
http://192.168.100.110:5601/
使用
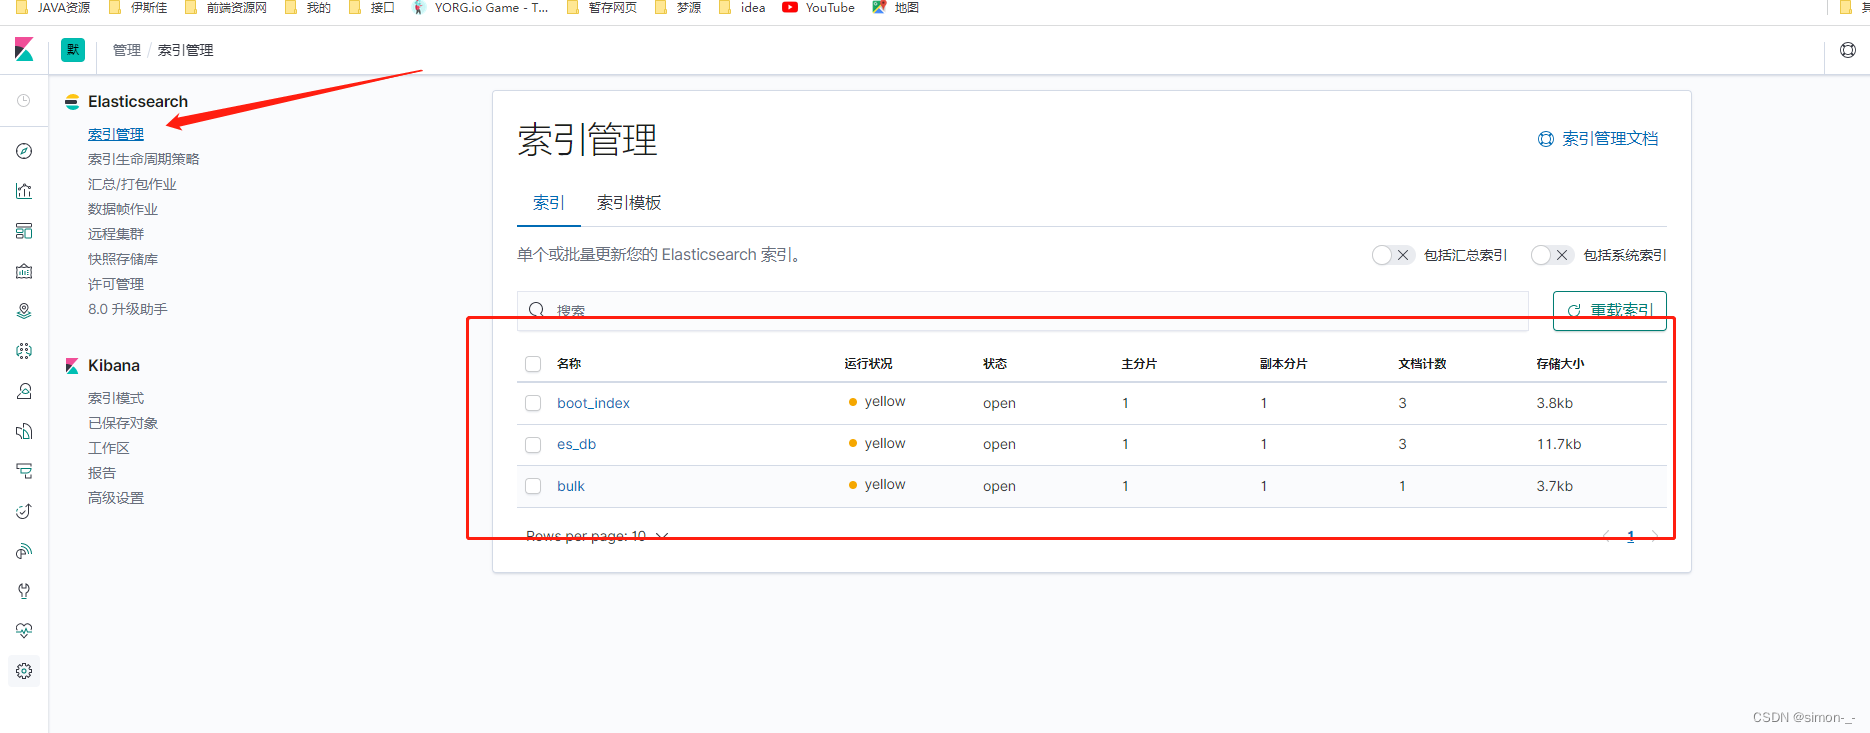
查看索引
在Management下的索引管理里查看目前es的全部索引

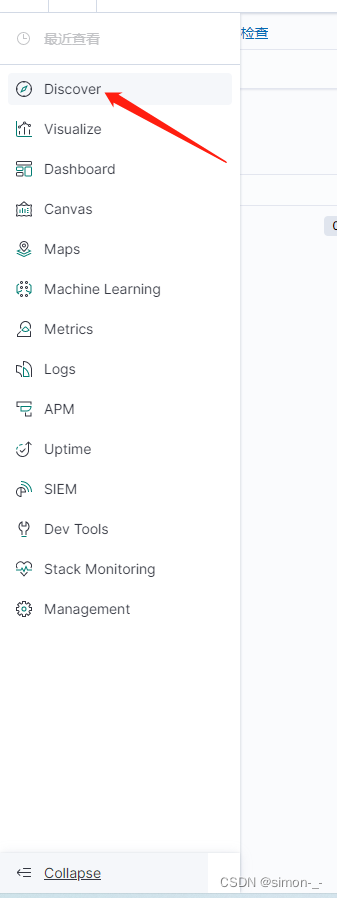
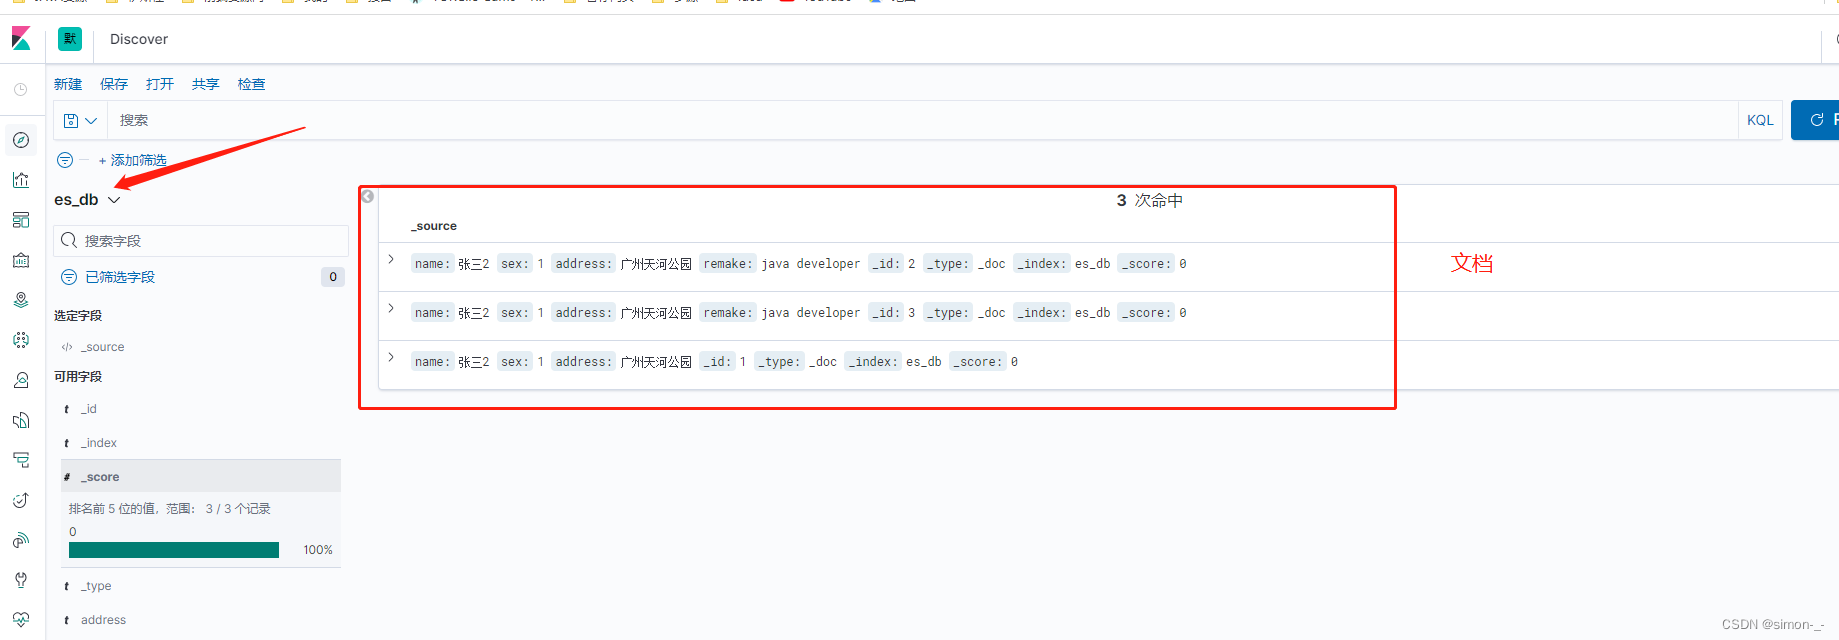
查看索引的文档
第一步先创建索引模式


IK分词器(elasticsearch插件)
安装
版本要与ElasticSearch版本对应
下载地址:https://github.com/medcl/elasticsearch-analysis-ik/releases

找到要下载的版本,不管你的es是安装在windows还是linux都是下载的zip文件,然后将解压后的文件放在es新建的ik文件夹,再重启es就行,Windows和linux都是一个道理
#在es的plugins目录下新建ik文件夹
mkdir /usr/local/elasticsearch-7.6.1/plugins/ik
cd  /usr/local/elasticsearch-7.6.1/plugins/ik
#下载ik压缩包
wget https://github.com/medcl/elasticsearch-analysis-ik/releases/download/v7.6.1/elasticsearch-analysis-ik-7.6.1.zip
#安装unzip
yum install unzip
#解压缩
unzip elasticsearch-analysis-ik-7.6.1.zip
经过上面的操作,ik目录就变成了这样

然后重启es

启动日志如图所示,说明ik分词器加载成功
在kibana上测试ik分词器
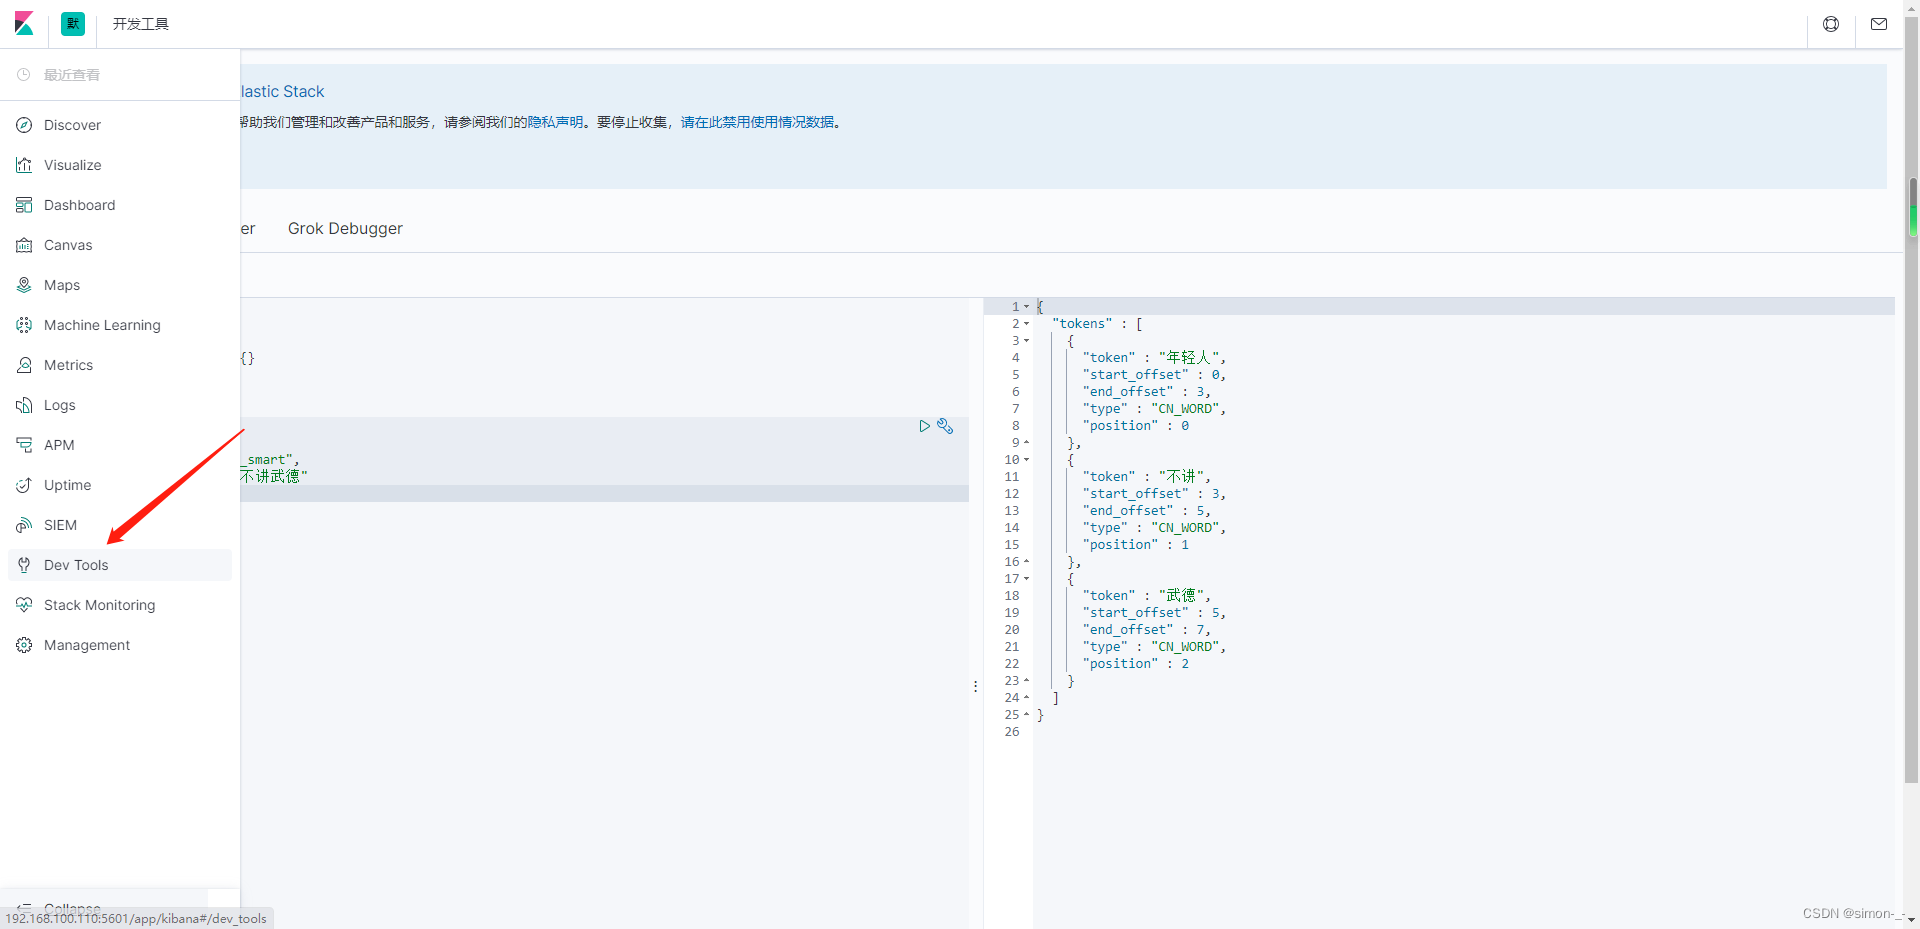
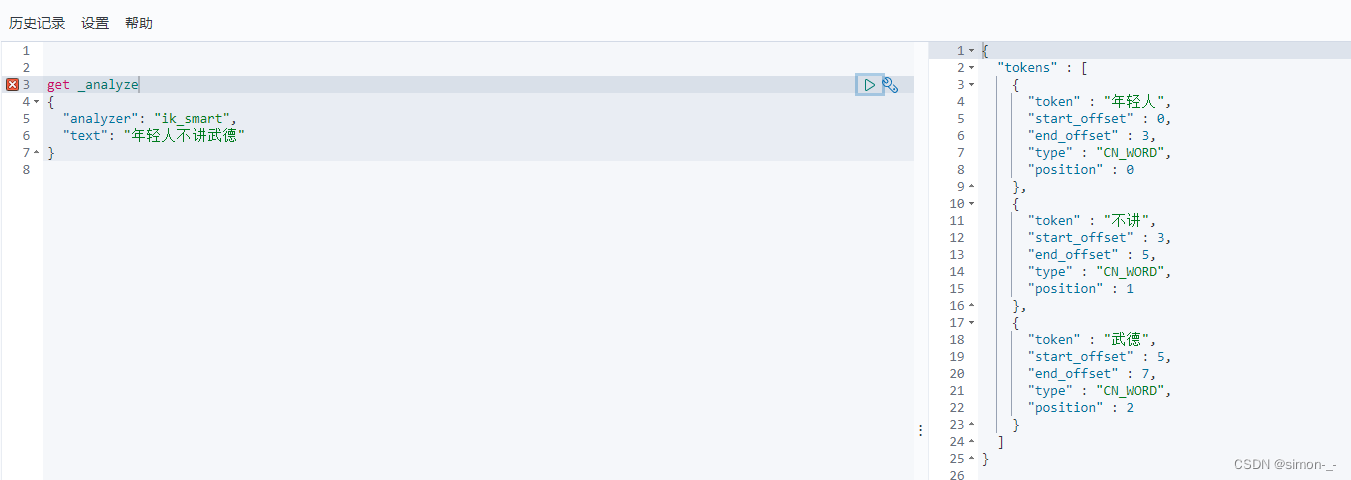

IK的 ik_smart 和 ik_max_word两种模式
ik_smart(最少切分):分词的时候只分一次,句子里面的每个字只会出现一次
ik_max_word(最细粒度划分(穷尽词库的可能)):句子的字可以反复出现。 只要在词库里面出现过的
就拆分出来。如果没有出现的单字。如果已经在词里面出现过,那么这个就不会以单字的形势出现
需要注意的是es加载了IK分词器并不代表es的的索引和文档都会使用IK分词器,安装IK分词器只是提供了一种选择,你可以在创建文档时选择使用IK分词器,如果不指定会默认使用es内置的标准分词器(Standard Analyzer)进行分词,这种分词器对中文不友好
自定义的词典
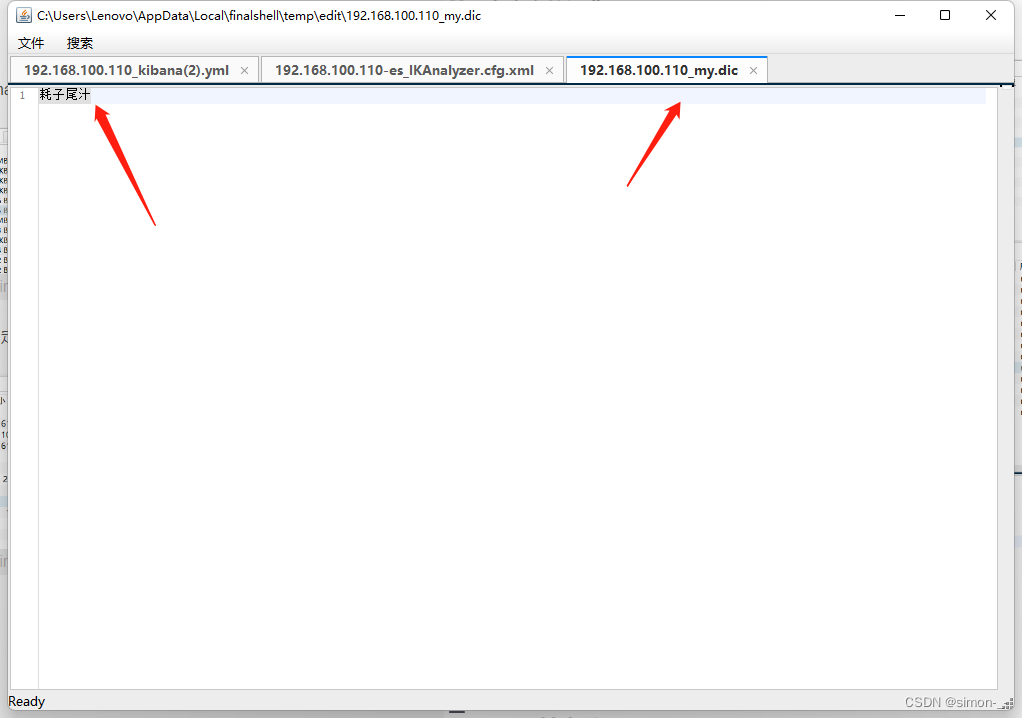
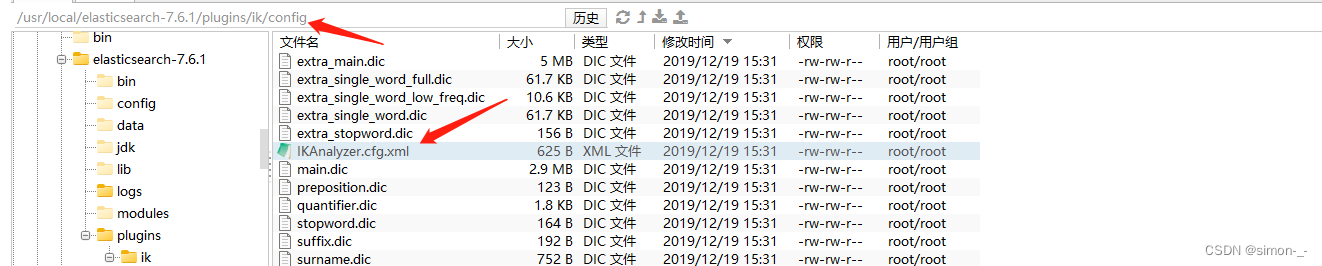
在elasticsearch目录/plugins/ik/config 添加自定义字典my.dic
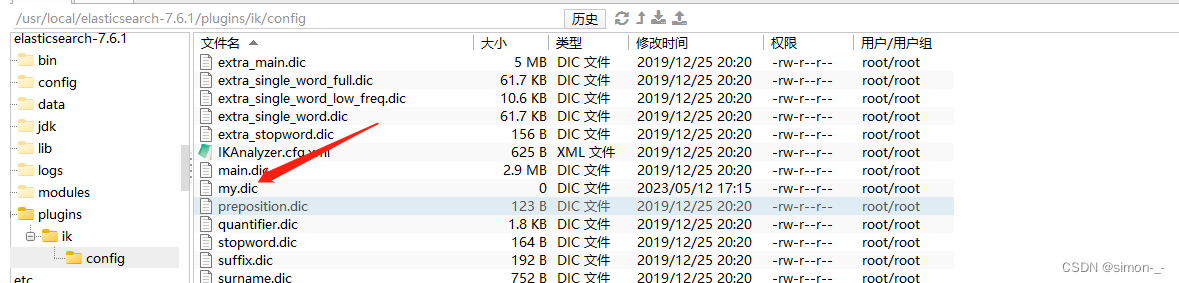
添加内容
修改elasticsearch目录/plugins/ik/config/IKAnalyzer.cfg.xml文件
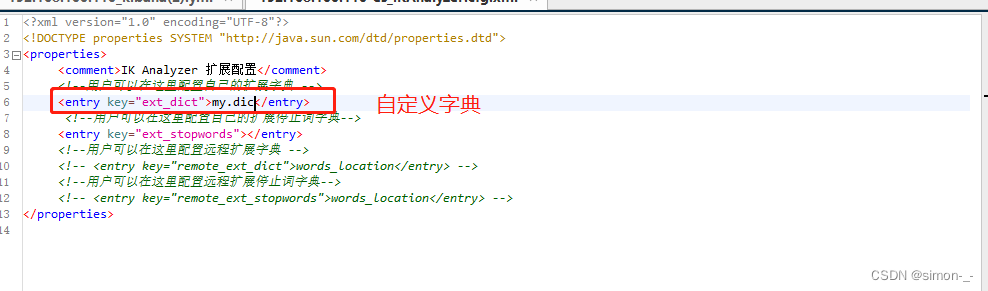
重启es测试
ES的基本使用
字段数据类型
字符串类型
text、keyword
text:支持分词,全文检索,支持模糊、精确查询,不支持聚合,排序操作;text类型的最大支持的字符长度无限制,适合大字段存储;
keyword:不进行分词,直接索引、支持模糊、支持精确匹配,支持聚合、排序操作。keyword类型的最大支持的长度为——32766个UTF-8类型的字符,可以通过设置ignore_above指定自持字符长度,超过给定长度后的数据将不被索引,无法通过term精确匹配检索返回结果。
数值型
long、Integer、short、byte、double、float、half float、scaled float
日期类型
date
te布尔类型
boolean
二进制类型
binary
索引操作
#创建索引
put /es_db
#查询索引
get es_db
#删除索引
delete es_db
#查询索引是否存在
HEAD es_db
#关闭索引
post /es_db/_close
#打开索引
post /es_db/_open
文档操作
创建文档
put、post、_create都可以创建文档,put要指定id,post也可以跟put一样创建文档,区别是post如果不指定id的话es会自动生成,_create如果id有存在会添加失败
#put添加文档
PUT /es_db/_doc/1
{
  "name":"张三",
  "sex":1,
  "age":25,
  "address":"广州天河公园",
  "remake":"java developer"
}
#post添加文档
POST /es_db/_doc
{
  "name":"张三2",
  "sex":1,
  "age":25,
  "address":"广州天河公园",
  "remake":"java developer"
}
POST /es_db/_doc/1
{
  "name":"张三2",
  "sex":1,
  "address":"广州天河公园",
  "remake":"java developer"
}
#_create添加文档
PUT /es_db/_create/1
{
  "name":"张三2",
  "sex":1,
  "address":"广州天河公园",
  "remake":"java developer"
}
查看文档
#根据ID查询指定文档
GET /es_db/_doc/1
#查询索引的全部文档
GET /es_db/_search
修改文档
tip:post和put覆盖更新都是会删除原来的文档再插入,会导致文档的属性丢失,_update是局部更新,只会更新选择的属性不会丢失,所以更新一般用_update
#post覆盖更新(删除原来的文档再插入)
POST /es_db/_doc/1
{
  "name":"张三2",
  "sex":1,
  "address":"广州天河公园",
  "remake":"java developer"
}
#put覆盖更新(删除原来的文档再插入)
PUT /es_db/_doc/1
{
  "name":"张三2",
  "sex":1,
  "address":"广州天河公园"
}
#局部更新文档(不会删除原来的属性,推荐用以下方法更新文档)
POST /es_db/_update/1
{
  "doc": {
    "age":27
  }
}
#查询后再更新
POST /es_db/_update_by_query
{
  "query":{
    "match":{
      "_id":1
    }
  },
  "script":{
    "source":"ctx._source.age=30"
  }
}
删除文档
#删除指定文档
DELETE /es_db/_doc/G17EmYgBvN_pzyBmoMoN
复杂查询
查询之前先创建索引并准备数据
创建blog索引并设置索引默认使用IK分词器的ik_max_word模式,不指定分词器会默认使用es内置的标准分词器(Standard Analyzer)进行分词,这个分词器在对中文分词时默认都是将中文的每个字当做一个词分,对中文不友好
##创建blog索引并设置索引默认使用IK分词器的ik_max_word模式,不指定分词器会默认使用es内置的标准分词器(Standard Analyzer)进行分词,这个分词器在对中文分词时默认都是将中文的每个字当做一个词分,对中文不友好
PUT /blog
{
  "settings": {
    "analysis": {
      "analyzer": {
        "default": {
          "tokenizer": "ik_max_word"
        }
      }
    }
  },
  "mappings": {
    "properties": {
      "name": {
        "type": "text"
      },
      "age": {
        "type": "long"
      },
      "birthday": {
        "type": "date"
      },
      "desc": {
        "type": "text"
      },
      "tag": {
        "type": "keyword"
      }
    }
  }
}
##插入数据
PUT /blog/_doc/1
{
  "id":"1",
  "name" : "刘民锴",
  "age" : 18,
  "desc":"java是最好的语言",
  "tab":"java是最好的语言"
}
PUT /blog/_doc/2
{
  "id":"2",
  "name" : "马老师",
  "age" : 18,
  "desc":"c是最好的语言",
  "tab":"c是最好的语言"
}
PUT /blog/_doc/3
{
  "id":"3",
  "name" : "流柚",
  "age" : 3,
  "desc":"c++是最好的语言",
  "tab":"c++是最好的语言"
}
查询匹配(匹配、过滤、排序、分页)
match:匹配(会先将搜索词进行分词在去文档搜索)
_source:过滤字段
sort:排序
form、size 分页
## 查询匹配
  GET /blog/_doc/_search
  {
    "query":{
      "match":{
        "name":"流"
      }
    }
    ,
    "_source": ["name","desc"]
    ,
    "sort": [
      {
        "age": {
          "order": "asc"
        }
      }
    ]
    ,
    "from": 0
    ,
    "size": 1
  }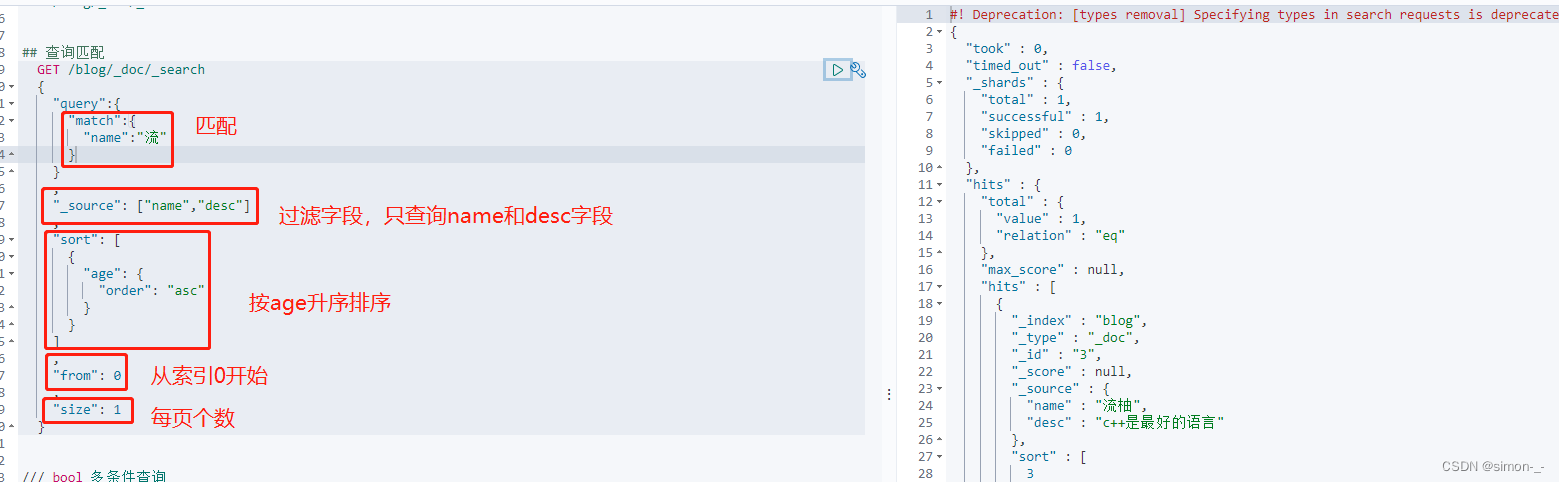
多条件查询(must、should、filter)
must 相当于 and
should 相当于 or
must_not 相当于 not (… and …)
filter 过滤
GET /blog/_doc/_search
{
  "query":{
    "bool": {
      "must": [
        {
          "match":{
            "age":3
          }
        },
        {
          "match": {
            "name": "流"
          }
        }
      ],
      "filter": {
        "range": {
          "age": {
            "gte": 1,
            "lte": 3
          }
        }
      }
    }
  }
}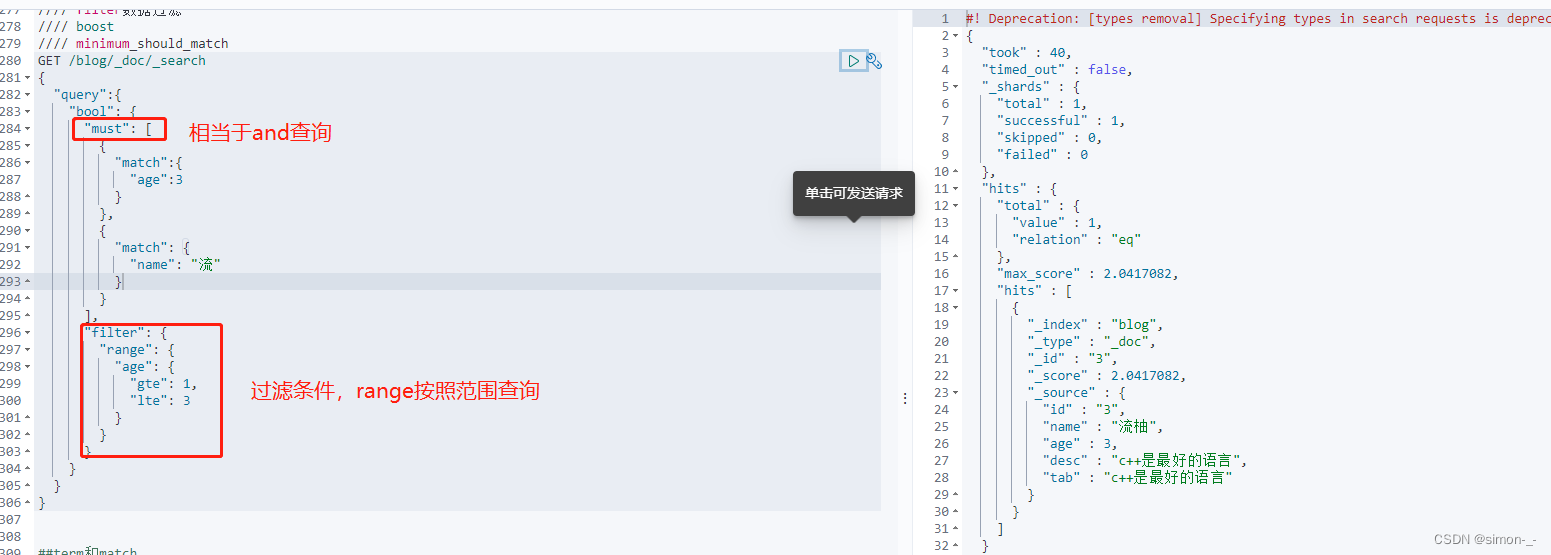
match和term查询
match会对搜索词进行分词,将分词后的field去倒排索引寻找文档;
term不会对搜索词进行分词,用搜索词去倒排索引寻找文档;
match和term的区别在于是否拆解搜索词
数据类型text和keyword的区别也是是否对数据分词
##term不分词,用java去搜索
GET /blog/_doc/_search
{
  "query":{
    "term":{
      "desc":"java"
    }
  }
}
##match分词,会将“java是”分成“java”和“是”再去搜索
GET /blog/_doc/_search
{
  "query":{
    "match":{
      "desc":"java是"
    }
  }
}
wildcard查询
用wildcard模拟mysql中的like “%java%”
通配符 * 来表示任意多个字符
? 来表示任意一个字符
##wildcard 是一种查询方式,用于在文本字段中进行通配符匹配,用wildcard模拟mysql中的like "%java%"
GET /blog/_doc/_search
{
  "query": {
    "wildcard": {
      "tab": "*java*"
    }
  }
}
高亮查询
##高亮查询 GET blog/_doc/_search { "query": { "match": { "name":"流" } } , "highlight": { "fields": { "name": {} } } } ##自定义前缀和后缀 GET blog/_doc/_search { "query": { "match": { "name":"流" } } , "highlight": { "pre_tags": "", "post_tags": "
", "fields": { "name": {} } } }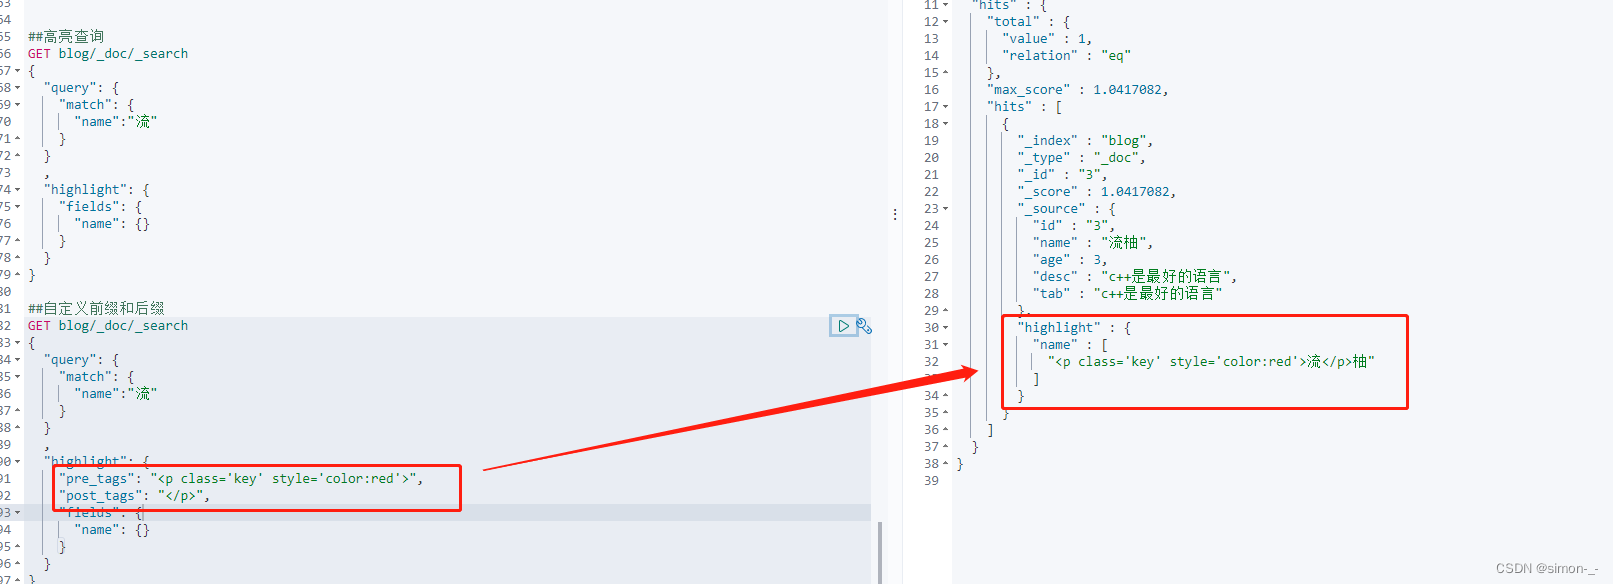
SpringBoot整合ES
目录结构
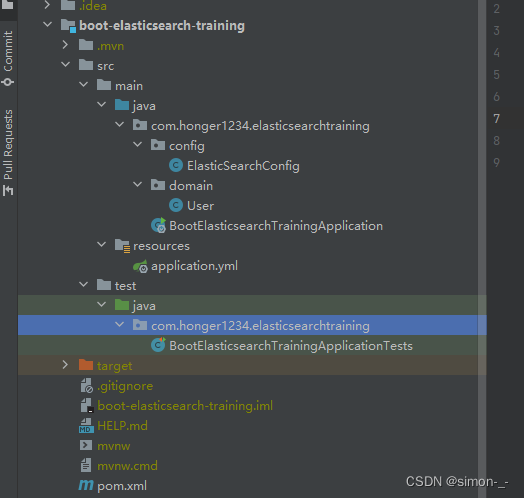
ElasticSearchConfig配置类
import org.apache.http.HttpHost;
import org.elasticsearch.client.RestClient;
import org.elasticsearch.client.RestHighLevelClient;
import org.springframework.beans.factory.annotation.Value;
import org.springframework.context.annotation.Bean;
import org.springframework.context.annotation.Configuration;
@Configuration
public class ElasticSearchConfig {
    @Value("${es.ip}")
    private String esIp;
    @Value("${es.port}")
    private Integer port;
    // 注册 rest高级客户端
    @Bean
    public RestHighLevelClient restHighLevelClient() {
        RestHighLevelClient client = new RestHighLevelClient(
                RestClient.builder(
                        new HttpHost(esIp, port, "http")
                )
        );
        return client;
    }
}
User类
import lombok.AllArgsConstructor;
import lombok.Data;
import lombok.NoArgsConstructor;
@Data
@NoArgsConstructor
@AllArgsConstructor
public class User {
    private String name;
    private Integer age;
}
application.yml
server:
  port: 8056
es:
  ip: 192.168.100.110
  port: 9200
BootElasticsearchTrainingApplicationTests测试用例类
import com.alibaba.fastjson.JSON; import com.honger1234.elasticsearchtraining.domain.User; import org.elasticsearch.action.admin.indices.delete.DeleteIndexRequest; import org.elasticsearch.action.bulk.BulkRequest; import org.elasticsearch.action.bulk.BulkResponse; import org.elasticsearch.action.delete.DeleteRequest; import org.elasticsearch.action.delete.DeleteResponse; import org.elasticsearch.action.get.GetRequest; import org.elasticsearch.action.get.GetResponse; import org.elasticsearch.action.index.IndexRequest; import org.elasticsearch.action.index.IndexResponse; import org.elasticsearch.action.search.SearchRequest; import org.elasticsearch.action.search.SearchResponse; import org.elasticsearch.action.support.master.AcknowledgedResponse; import org.elasticsearch.action.update.UpdateRequest; import org.elasticsearch.action.update.UpdateResponse; import org.elasticsearch.client.RequestOptions; import org.elasticsearch.client.RestHighLevelClient; import org.elasticsearch.client.indices.CreateIndexRequest; import org.elasticsearch.client.indices.CreateIndexResponse; import org.elasticsearch.client.indices.GetIndexRequest; import org.elasticsearch.common.unit.TimeValue; import org.elasticsearch.common.xcontent.XContentType; import org.elasticsearch.index.query.QueryBuilders; import org.elasticsearch.index.query.TermQueryBuilder; import org.elasticsearch.search.SearchHit; import org.elasticsearch.search.SearchHits; import org.elasticsearch.search.builder.SearchSourceBuilder; import org.elasticsearch.search.fetch.subphase.FetchSourceContext; import org.elasticsearch.search.fetch.subphase.highlight.HighlightBuilder; import org.junit.jupiter.api.Test; import org.springframework.beans.factory.annotation.Autowired; import org.springframework.boot.test.context.SpringBootTest; import java.io.IOException; import java.util.concurrent.TimeUnit; @SpringBootTest class BootElasticsearchTrainingApplicationTests { @Autowired public RestHighLevelClient restHighLevelClient; // 测试索引的创建, Request PUT boot_index @Test public void testCreateIndex() throws IOException { CreateIndexRequest request = new CreateIndexRequest("boot_index"); CreateIndexResponse response = restHighLevelClient.indices().create(request, RequestOptions.DEFAULT); System.out.println(response.isAcknowledged());// 查看是否创建成功 restHighLevelClient.close(); } // 获取索引,并判断其是否存在 @Test public void testIndexIsExists() throws IOException { GetIndexRequest request = new GetIndexRequest("boot_index"); boolean exists = restHighLevelClient.indices().exists(request, RequestOptions.DEFAULT); System.out.println(exists);// 索引是否存在 restHighLevelClient.close(); } // 测试索引删除 @Test public void testDeleteIndex() throws IOException { DeleteIndexRequest request = new DeleteIndexRequest("boot_index"); AcknowledgedResponse response = restHighLevelClient.indices().delete(request, RequestOptions.DEFAULT); System.out.println(response.isAcknowledged());// 是否删除成功 restHighLevelClient.close(); } // 添加文档(先创建一个User实体类,添加fastjson依赖) @Test public void testAddDocument() throws IOException { // 创建一个User对象 User liuyou = new User("张三", 18); // 创建请求 IndexRequest request = new IndexRequest("boot_index"); // 制定规则 PUT /boot_index/_doc/1 request.id("1");// 设置文档ID request.timeout(TimeValue.timeValueMillis(1000));// request.timeout("1s") // 将我们的数据放入请求中 request.source(JSON.toJSONString(liuyou), XContentType.JSON); // 客户端发送请求,获取响应的结果 IndexResponse response = restHighLevelClient.index(request, RequestOptions.DEFAULT); System.out.println(response.status());// 获取建立索引的状态信息 CREATED System.out.println(response);// 查看返回内容 IndexResponse[index=liuyou_index,type=_doc,id=1,version=1,result=created,seqNo=0,primaryTerm=1,shards={"total":2,"successful":1,"failed":0}] } // 获得指定文档信息 @Test public void testGetDocument() throws IOException { GetRequest request = new GetRequest("boot_index", "1"); GetResponse response = restHighLevelClient.get(request, RequestOptions.DEFAULT); System.out.println(response.getSourceAsString());// 打印文档内容 System.out.println(request);// 返回的全部内容和命令是一样的 restHighLevelClient.close(); } /** * 查询索引的全部文档 * * @throws IOException */ @Test public void testGetAllDocument() throws IOException { SearchRequest searchRequest = new SearchRequest("boot_index"); SearchResponse search = restHighLevelClient.search(searchRequest, RequestOptions.DEFAULT); for (SearchHit hit : search.getHits().getHits()) { System.out.println(hit.getSourceAsString()); } restHighLevelClient.close(); } // 获取文档,判断是否存在 get /boot_index/_doc/1 @Test public void testDocumentIsExists() throws IOException { GetRequest request = new GetRequest("boot_index", "1"); // 不获取返回的 _source的上下文了 request.fetchSourceContext(new FetchSourceContext(false)); request.storedFields("_none_"); boolean exists = restHighLevelClient.exists(request, RequestOptions.DEFAULT); System.out.println(exists); } // 更新文档内容 @Test public void testUpdateDocument() throws IOException { UpdateRequest request = new UpdateRequest("boot_index", "1"); User user = new User("李四", 11); request.doc(JSON.toJSONString(user), XContentType.JSON); UpdateResponse response = restHighLevelClient.update(request, RequestOptions.DEFAULT); System.out.println(response.status()); // OK restHighLevelClient.close(); } // 删除文档 @Test public void testDeleteDocument() throws IOException { DeleteRequest request = new DeleteRequest("boot_index", "1"); request.timeout("1s"); DeleteResponse response = restHighLevelClient.delete(request, RequestOptions.DEFAULT); System.out.println(response.status());// OK } /** * 批量添加文档 * * @throws IOException */ @Test public void testBatchAdd() throws IOException { BulkRequest bulkRequest = new BulkRequest(); for (int i = 0; ipom.xml
1.8 7.6.1 org.springframework.boot spring-boot-starter org.springframework.boot spring-boot-starter-test test org.springframework.boot spring-boot-starter-data-elasticsearch com.alibaba fastjson 1.2.70 org.projectlombok lombok true
参考链接
视频地址:https://www.bilibili.com/video/BV17a4y1x7zqp=10&vd_source=a3d625a64090fc4e2e34f1ae12c724f1
https://www.bilibili.com/video/BV1JY4y1Z714?p=18&vd_source=a3d625a64090fc4e2e34f1ae12c724f1
文档地址: https://www.kuangstudy.com/bbs/1354069127022583809#header23
-


")
")
")
")
还没有评论,来说两句吧...