

CS144(2023 Spring)Lab 0:networking warmup(环境搭建 & webget & bytestream)
文章目录
- 前言
- 其他笔记
- 相关链接
- 1. Set up GNU/Linux on your computer
- 2. Networking by hand
- 3. Writing a network program using an OS stream socket
- 3.1 Linux配置
- 3.2 C++规范
- 3.3 Writing webget
- 3.3.1 实现
- 3.3.2 测试
- 4. An in-memory reliable byte stream
- 4.1 思路分析
- 4.2 代码展示
- 4.3 代码测试
前言
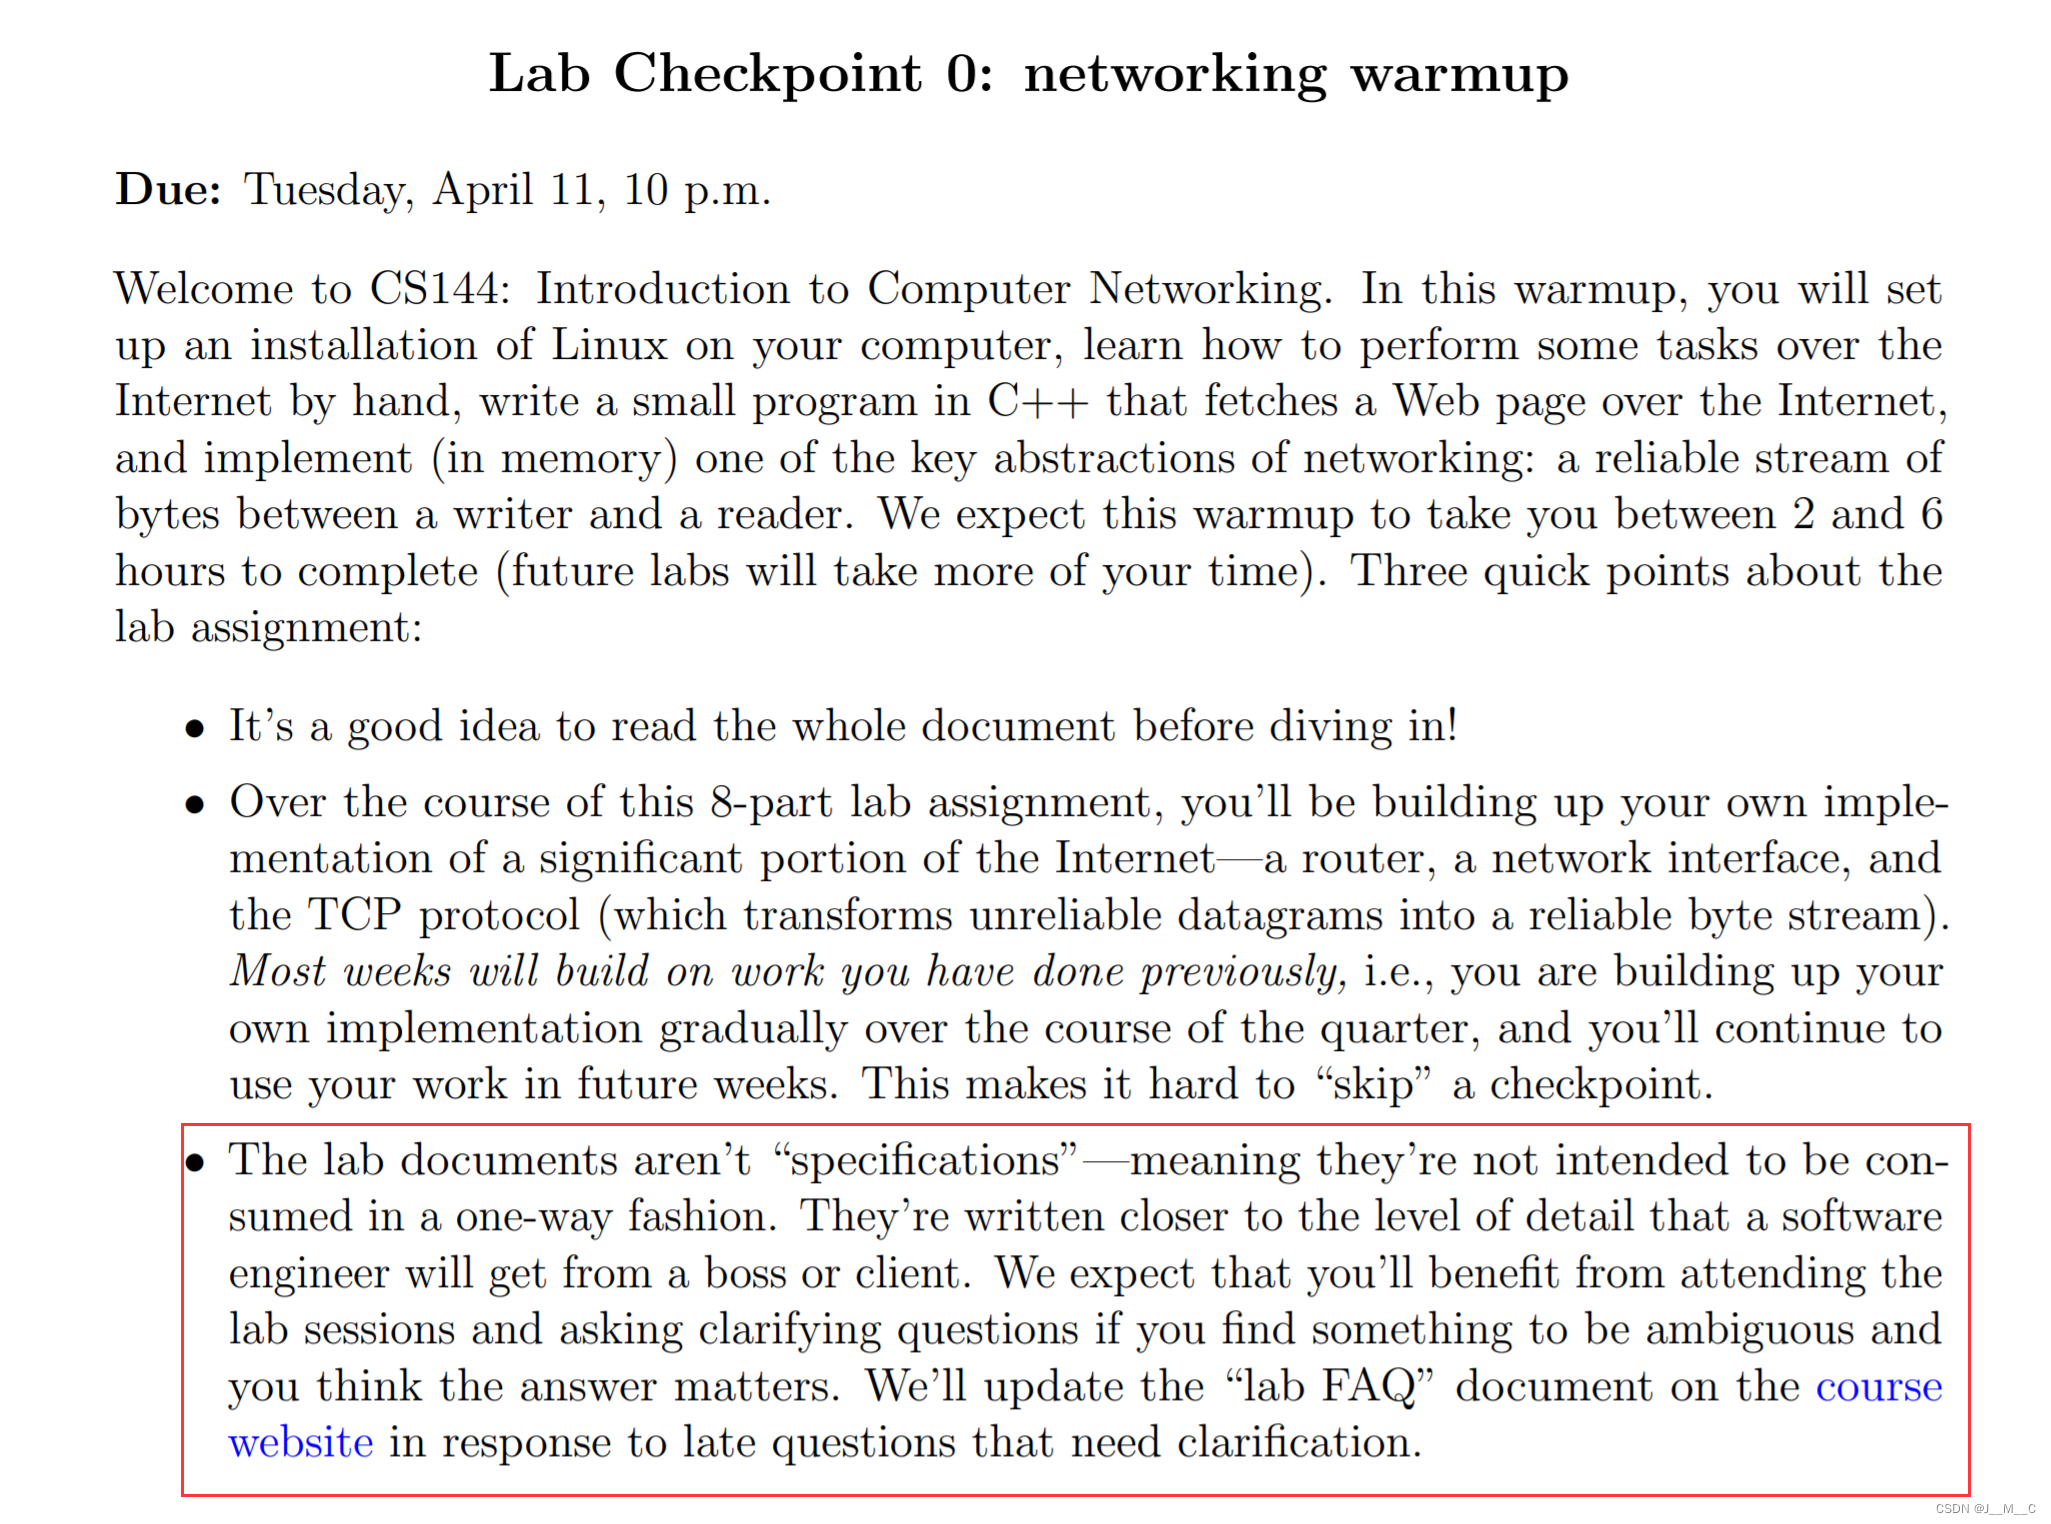
最近心情非常郁闷,搓一个CS144玩玩吧,正好2023 spring出新版了。。。CS144的头4个Lab(加上0是5个),一步步实现了一个TCP。在开始之前,我想贴一下Lab中的这句话:The lab documents aren’t “specifications”—meaning they’re not intended to be consumed in a one-way fashion. They’re written closer to the level of detail that a software
其他笔记
Lab 0: networking warmup
Lab 1: stitching substrings into a byte stream
相关链接
课程主页
(图片来源网络,侵删)lab 0
1. Set up GNU/Linux on your computer
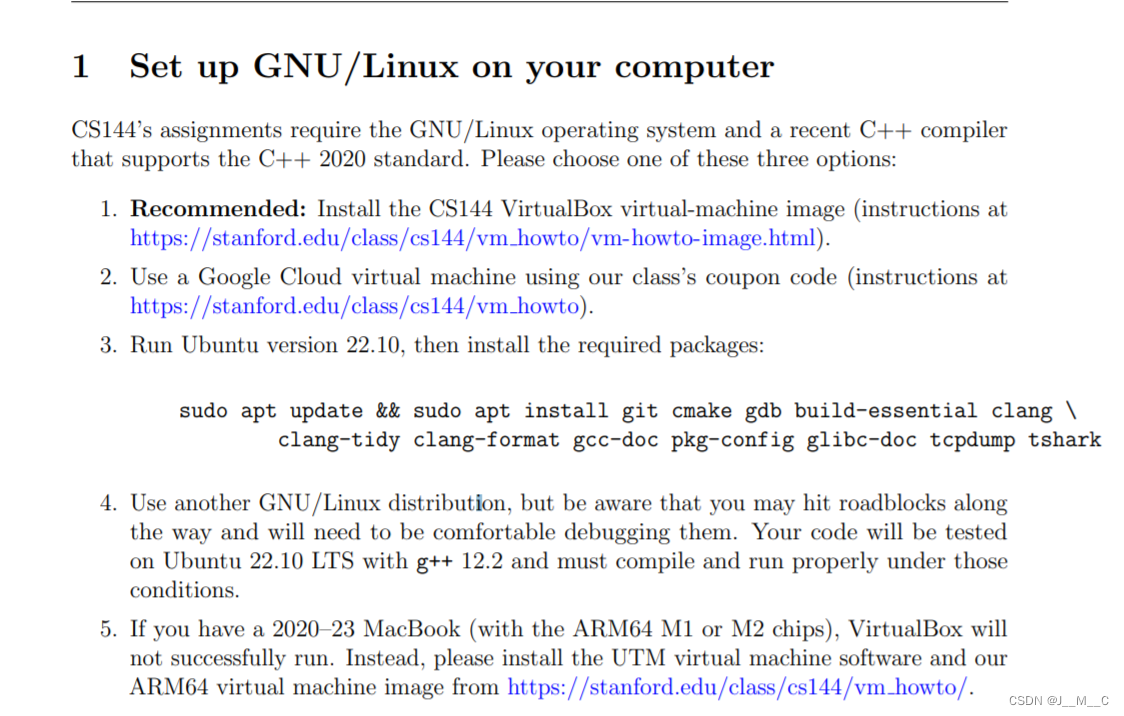
官方推荐环境有vbox镜像、谷歌云,以及原生Ubuntu安装,我本来想下他那个镜像的就懒得配了,结果一看3G大,挂上魔法都只有100kb的龟速。。。还是用我的WSL吧,Ubuntu版本要求22.10,g++要求12.2
命令行运行它这一串就行了
sudo apt update && sudo apt install git cmake gdb build-essential clang \
clang-tidy clang-format gcc-doc pkg-config glibc-doc tcpdump tshark
这里点是
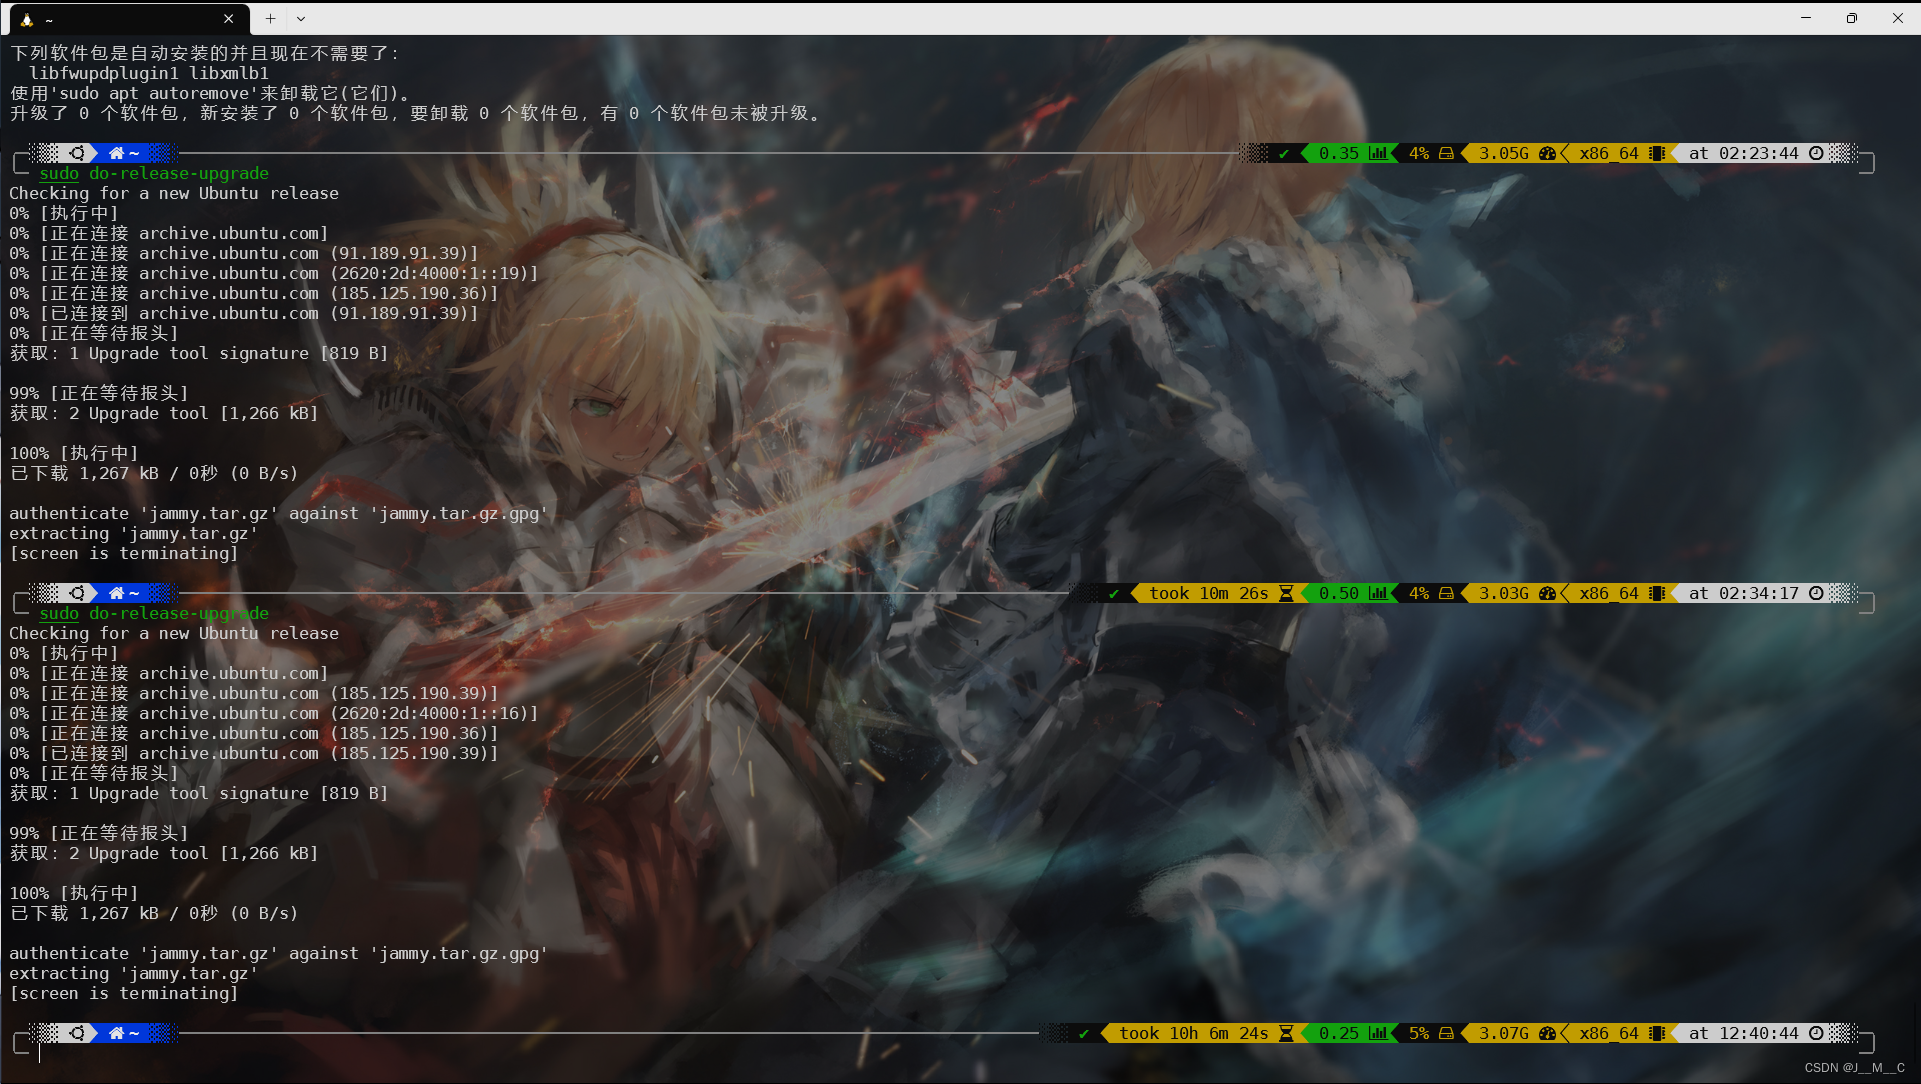
由于lab要求使用gcc12,而Ubuntu20的官方源没有gcc12,我选择将Ubuntu20直接更新到22,但是强烈不推荐,因为众所周知的原因,我在更新系统的途中耗时极多。。如图,花了得有几个小时。。建议去微软商店里面直接下载新的22。
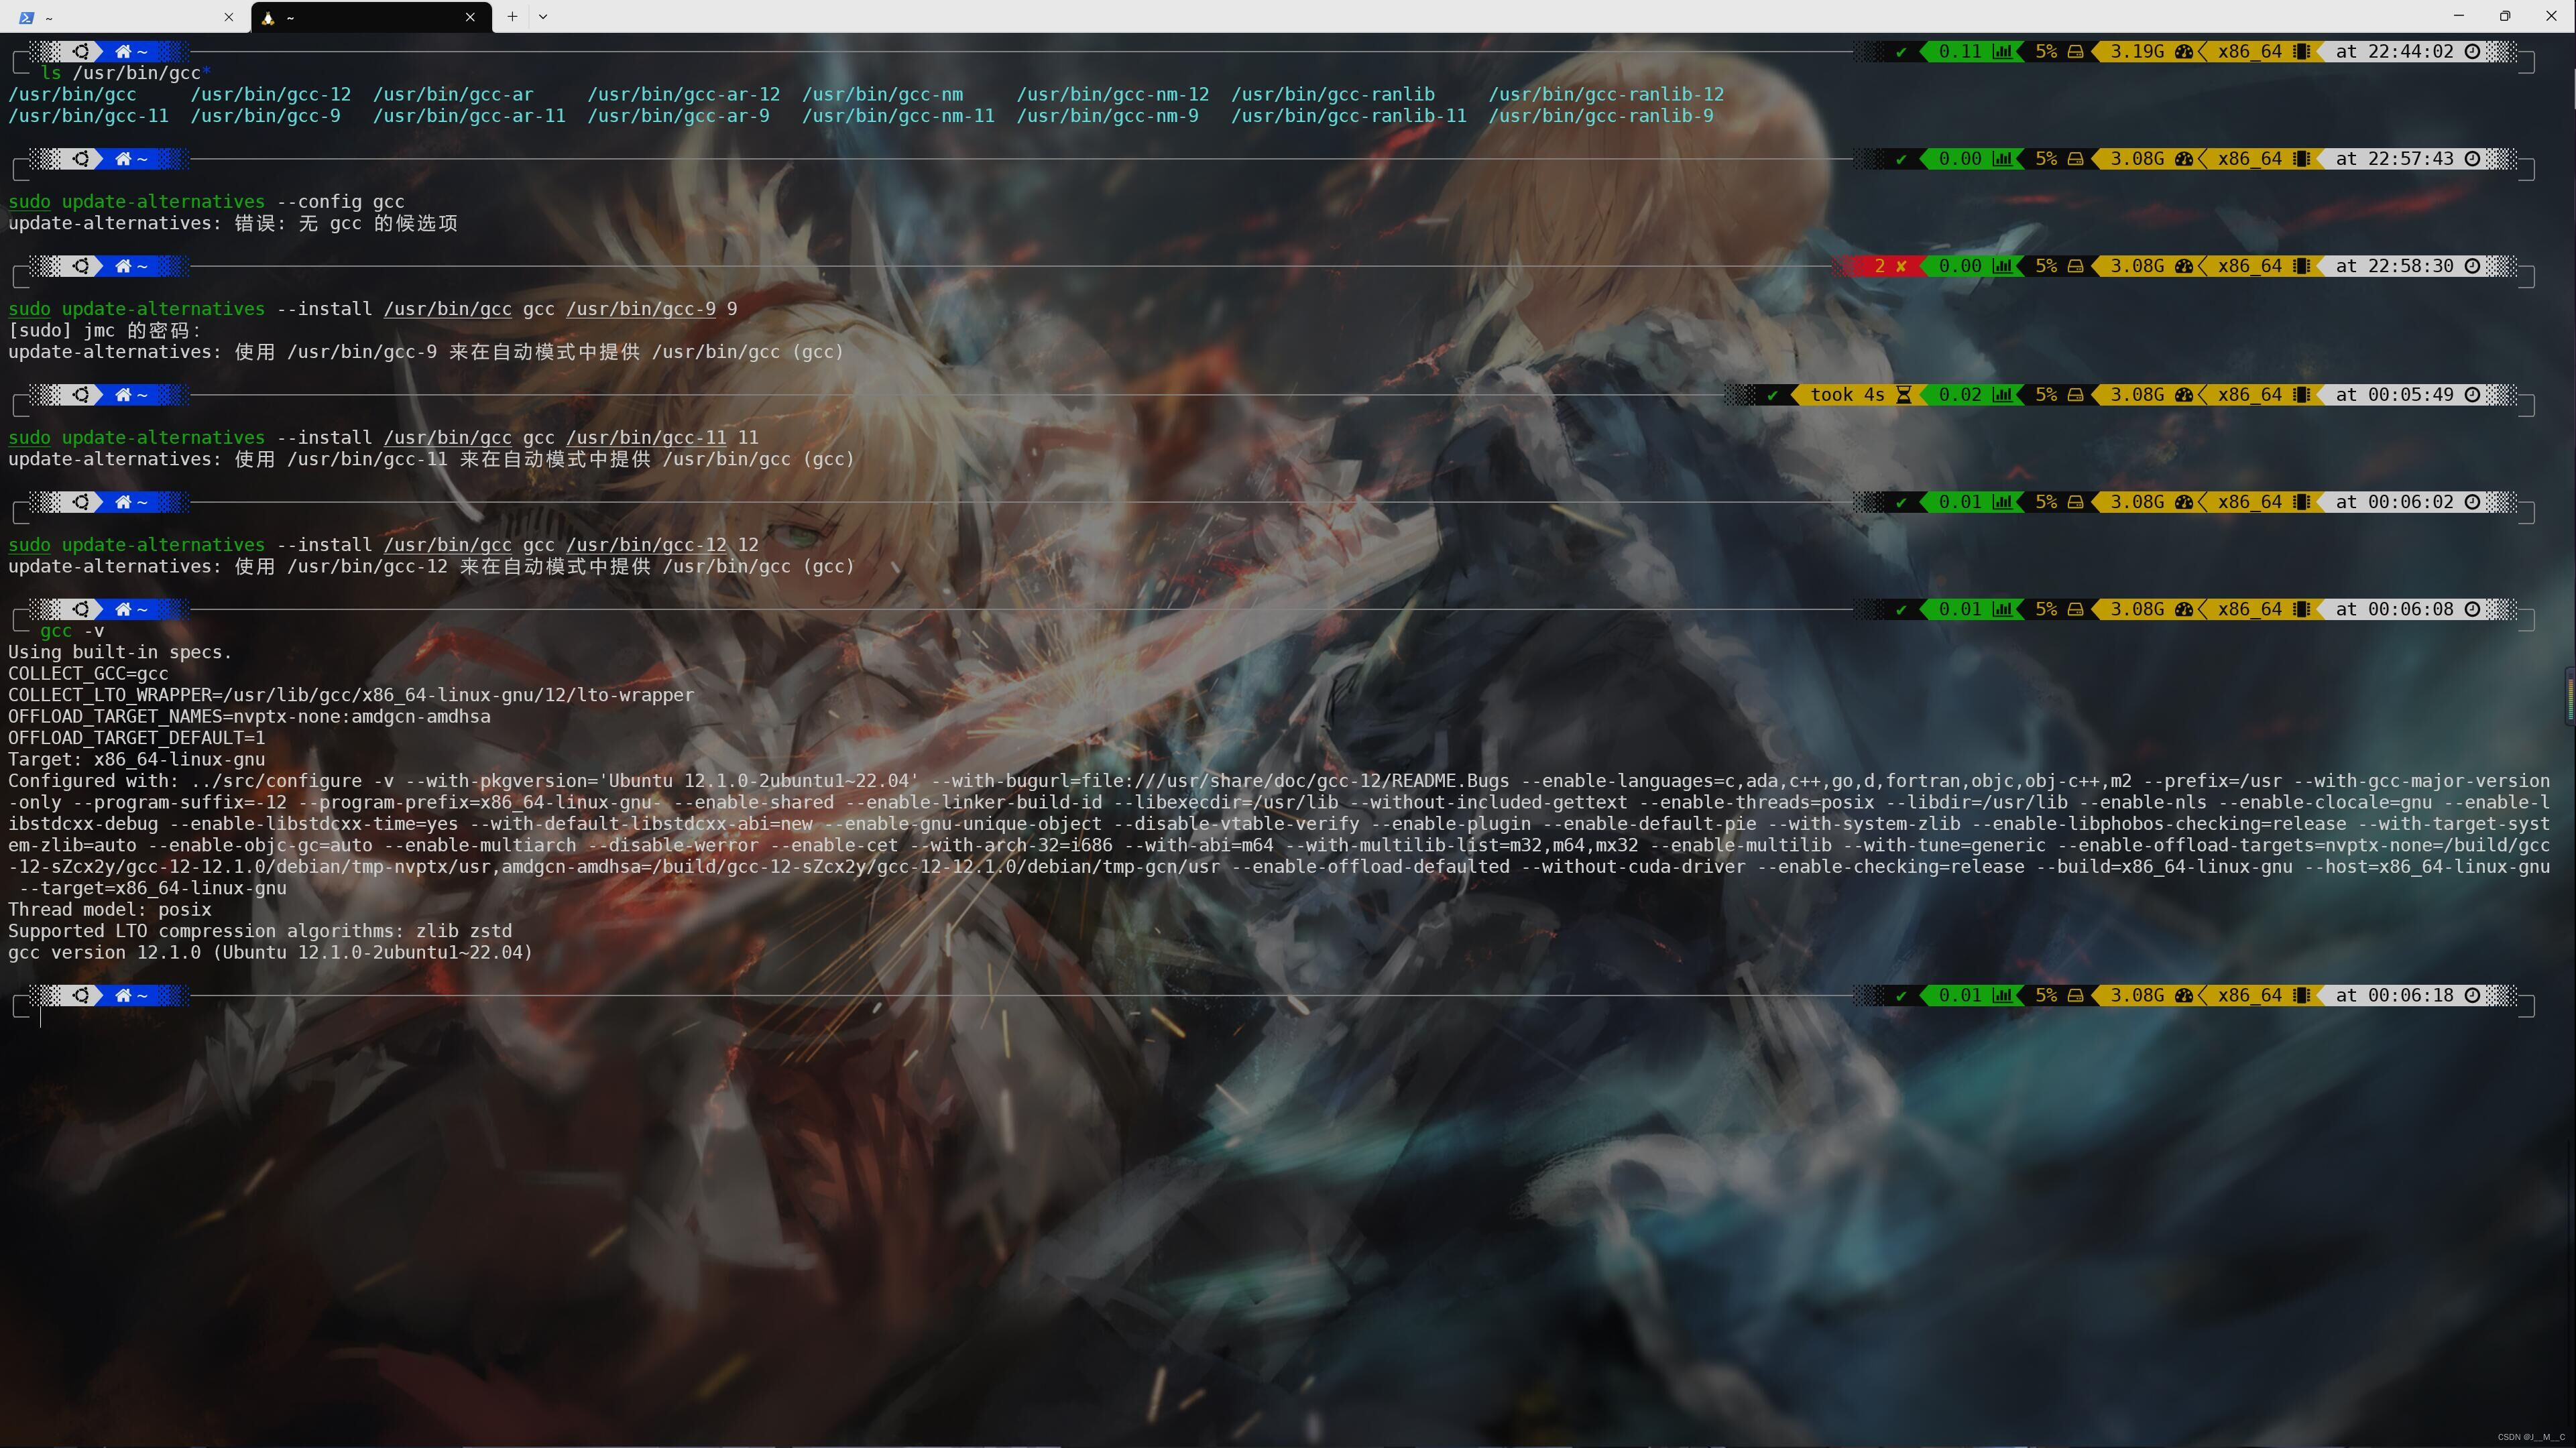
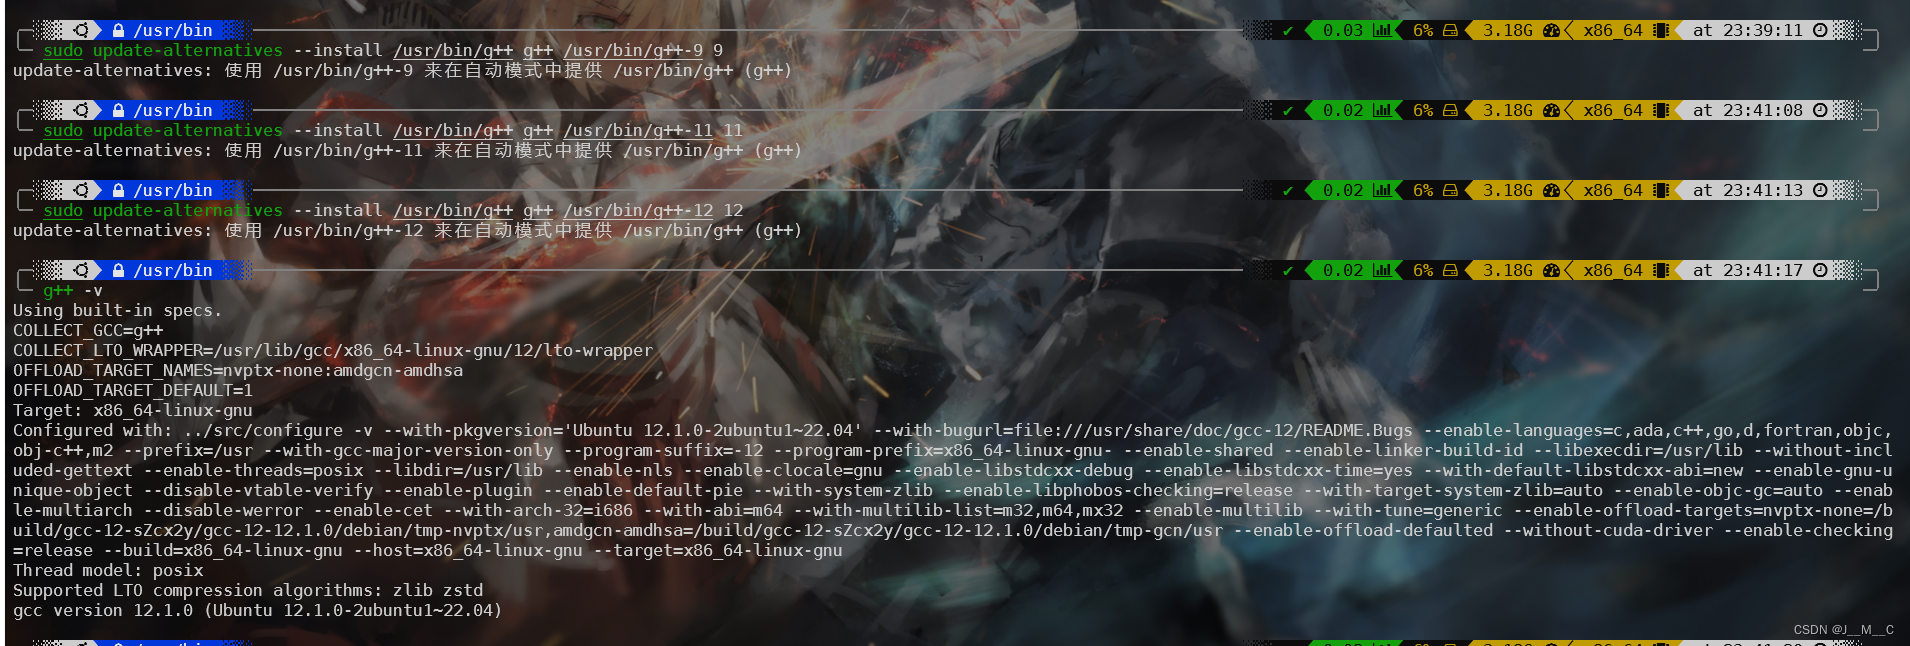
安装好gcc12后,可以如图指定gcc各版本优先级以指定默认版本。
2. Networking by hand
这一节主要是叫你手动搭建网络感受一下里面的过程,头俩没啥好说的,2.3 Listening and connecting的比较有意思,是叫搭建一个双工通信:
首先我们在终端里跑一下netcat -v -l -p 9090:

然后新开一个终端,在里面运行telnet localhost 9090:
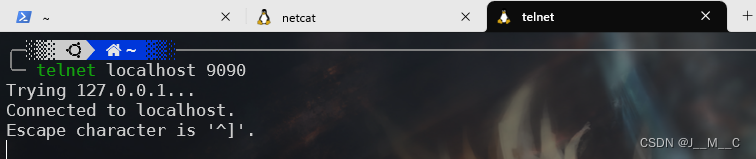
可以看到它建立了连接,这个时候我们回到刚才的终端,发现更新了:

我们随便输入一点东西,并切到隔壁去,会发现隔壁也能收到并显示:
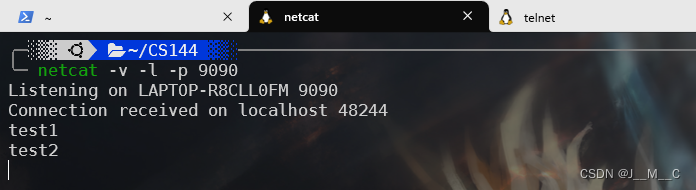
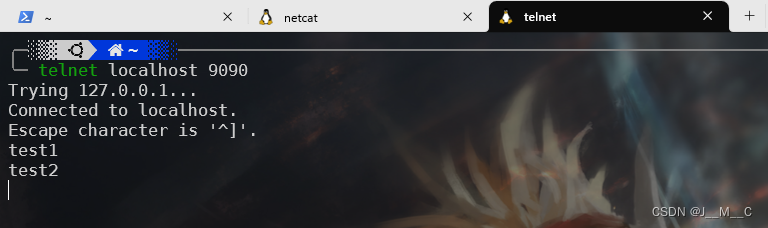
这个操作在两边都能完成,可以看出我们建立了双工通信。
3. Writing a network program using an OS stream socket
Task3是叫用socket简单写一个网络编程。值得一提的是,Lab鼓励我们用上Modern C++,从代码上来看,Lab自己至少使用了C++20的内容,而我也会尽可能展示C++20乃至C++23的实现()
3.1 Linux配置
这一步我们先在linux里拉取仓库代码后编译,不过这个项目要求cmake 3.24.2以上 = =,我的是3.22.1,汗。。。又要更新,我直接更新到了3.27.0。

跟着流程走一遍编译:
git clone https://github.com/cs144/minnow
cd minnow
cmake -S . -B build
cmake --build build
发现报了俩错
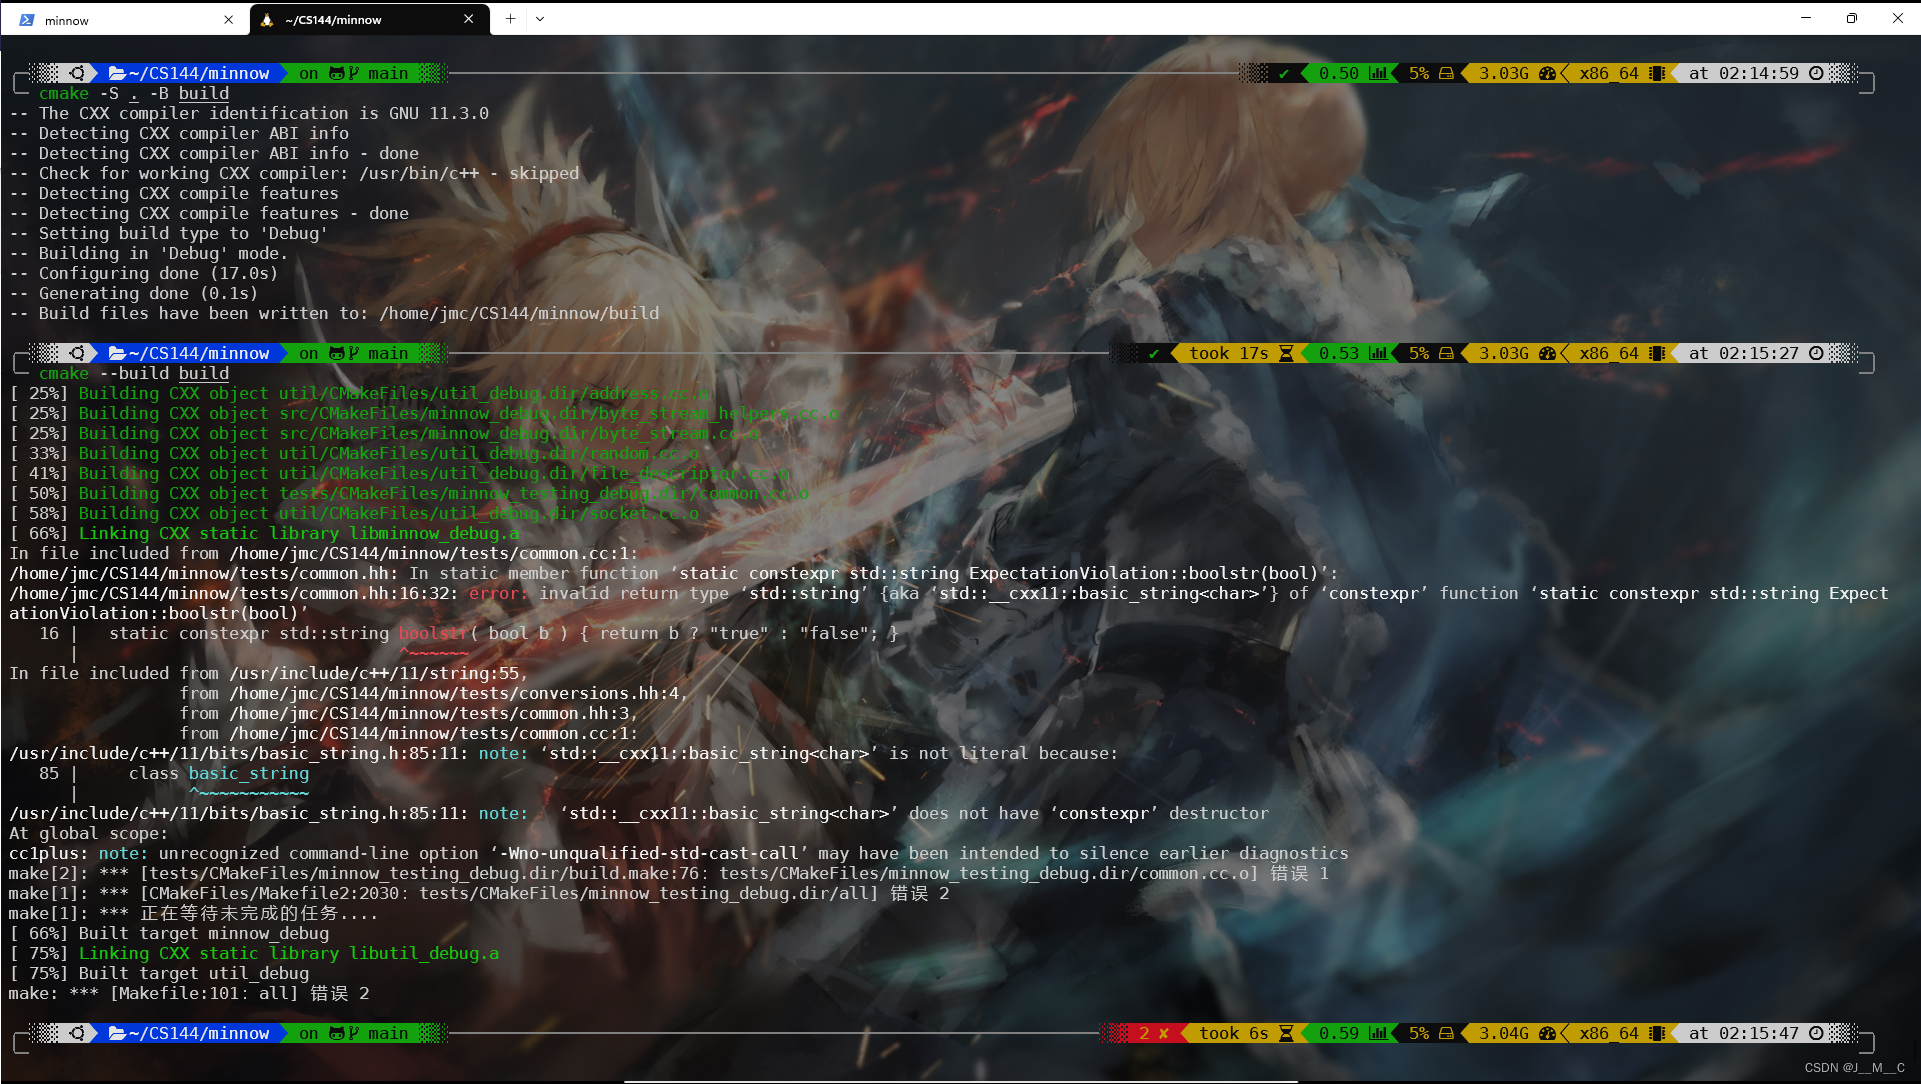
把报错贴出来方便后来人搜索:
error: invalid return type ‘std::string’ {aka ‘std::__cxx11::basic_string’} of ‘constexpr’ function ‘static constexpr std::string ExpectationViolation::boolstr(bool)’
16 | static constexpr std::string boolstr( bool b ) { return b ? “true” : “false”; }
| ^~~~~~~
看一下报错说的是string不为constexpr类型,我记得constexpr string好像是C++20的内容,这里用的C++11,明显是编译器环境没整对,一查g++ -v,发现果然之前搞了gcc的默认忘改g++了,同样的操作软链接一下:
再跑一下编译,很成功:

然后我们还是把他推到我们现有的库里
git remote rm origin                 # 删除当前远程库
git remote add origin  + 远程仓库地址  # 连接到现有的自己的库
git branch -M main
git push -u origin main
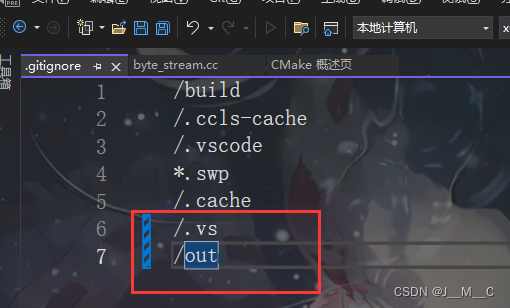
然后在vs里导入这个仓库,不演示了。拿到手上先把构建项目的文件给加进gitignore里面:
我的工具链一般是VS上编辑完后,git到远程,然后wsl上拉取后编译运行。如果需要调试,就直接在VS上打断点在VS上运行调试,这个Lab有CMake,方便得多。
3.2 C++规范
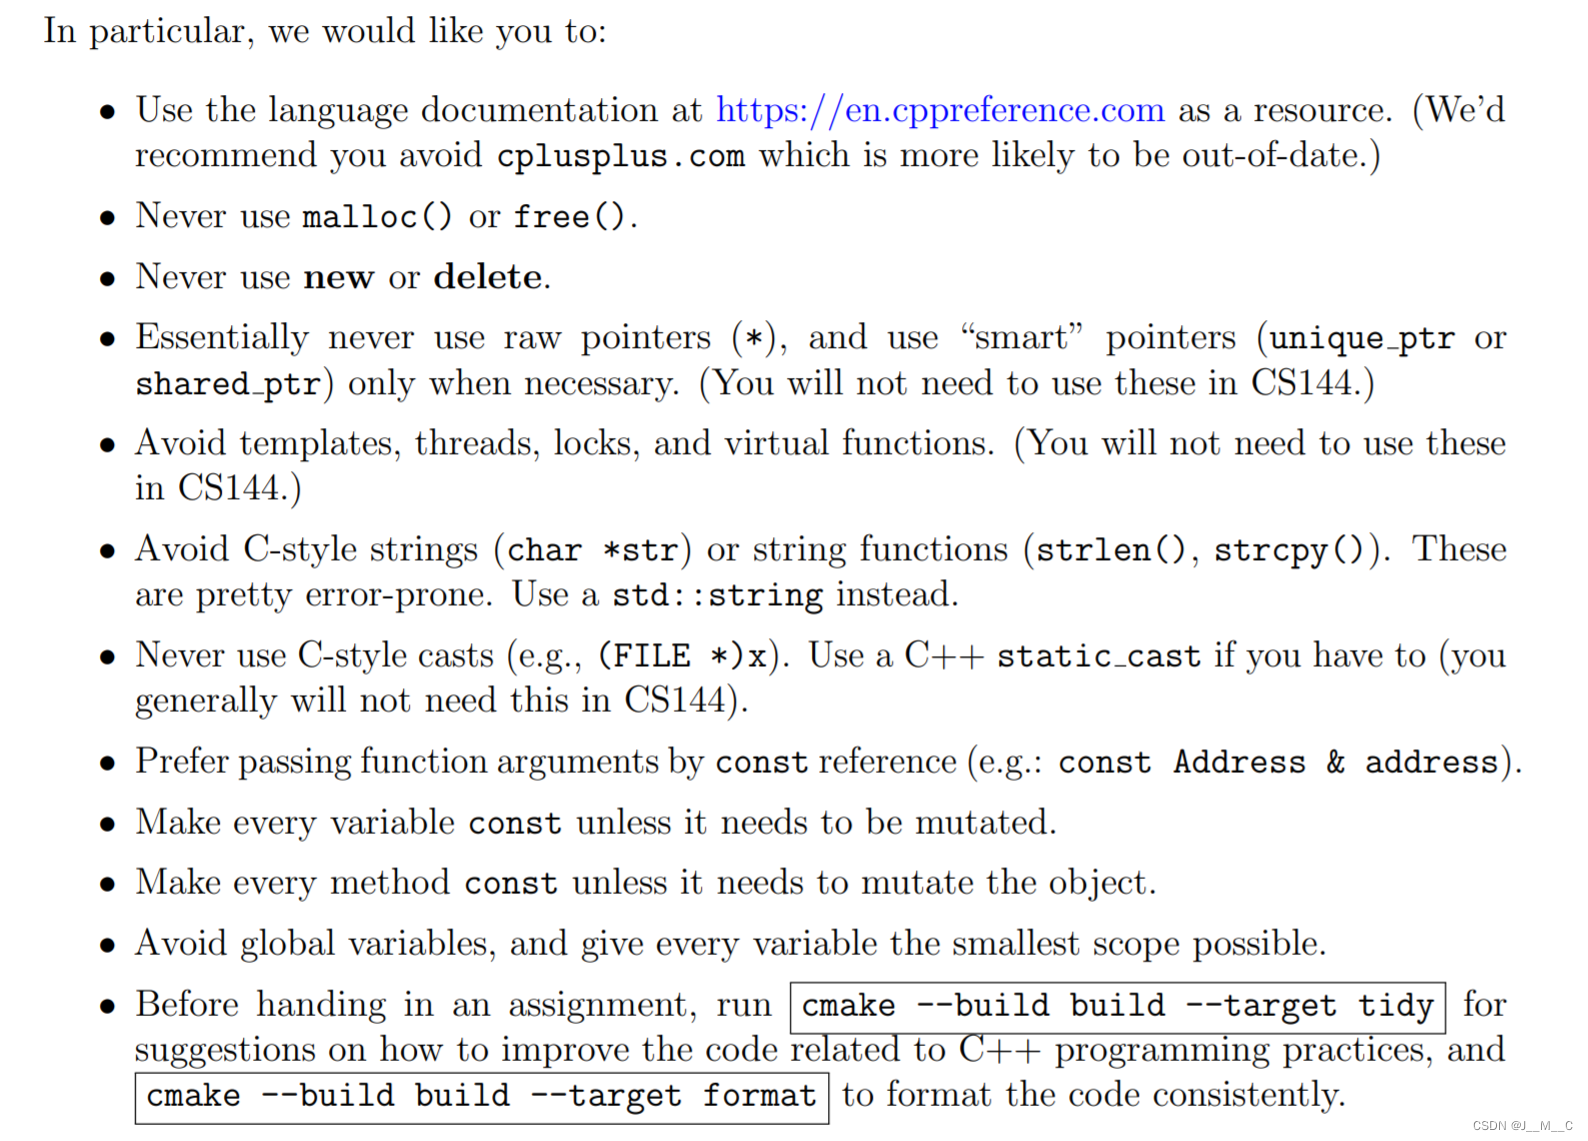
在开始之前,我们来看一下他提到的一些规范要求:
- 禁用动态内存分配(malloc&free、new&delete)
- 禁用裸指针、如果要用指针就用智能指针,不过看提示说CS144不太用得到指针
- 避免模板、线程、锁、虚函数,说CS144用不到这些
- 避免使用C风格字符串和C的那一套str-函数,用std::string代替
- 避免使用C风格cast,用static_cast代替,不过CS144一般用不到
- 尽量使用const引用传参
- 函数和变量能用const修饰则用const修饰
- 避免使用全局变量,把变量限定在尽可能小的作用域里
- 使用cmake --build build --target tidy获取代码建议,cmake --build build --target format去格式化
这几条都是比较常规的规范,没啥值得注意的。
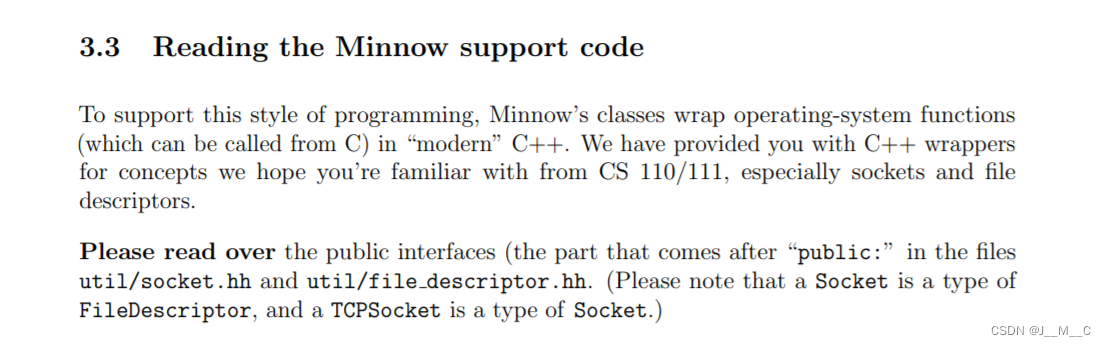
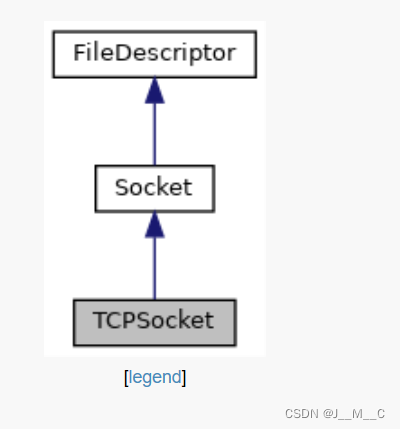
然后他说Lab用类封装了各种各样的system function,并且叫你读一下socket.hh和file_descriptor.hh的公共接口,看它的描述,Socket是一种文件描述符,而TCPSocket是一种Socket。我们可以借助他的这个文档看,实际看实现就是逐层继承的关系。
看一下接口,都是很常规的socket API,值得注意的一点是今年这里面有的API和往年的不一样!所以还是要以源码为准:

3.3 Writing webget
3.3.1 实现
终于要开始写代码了,在/apps/webget.cc里面写
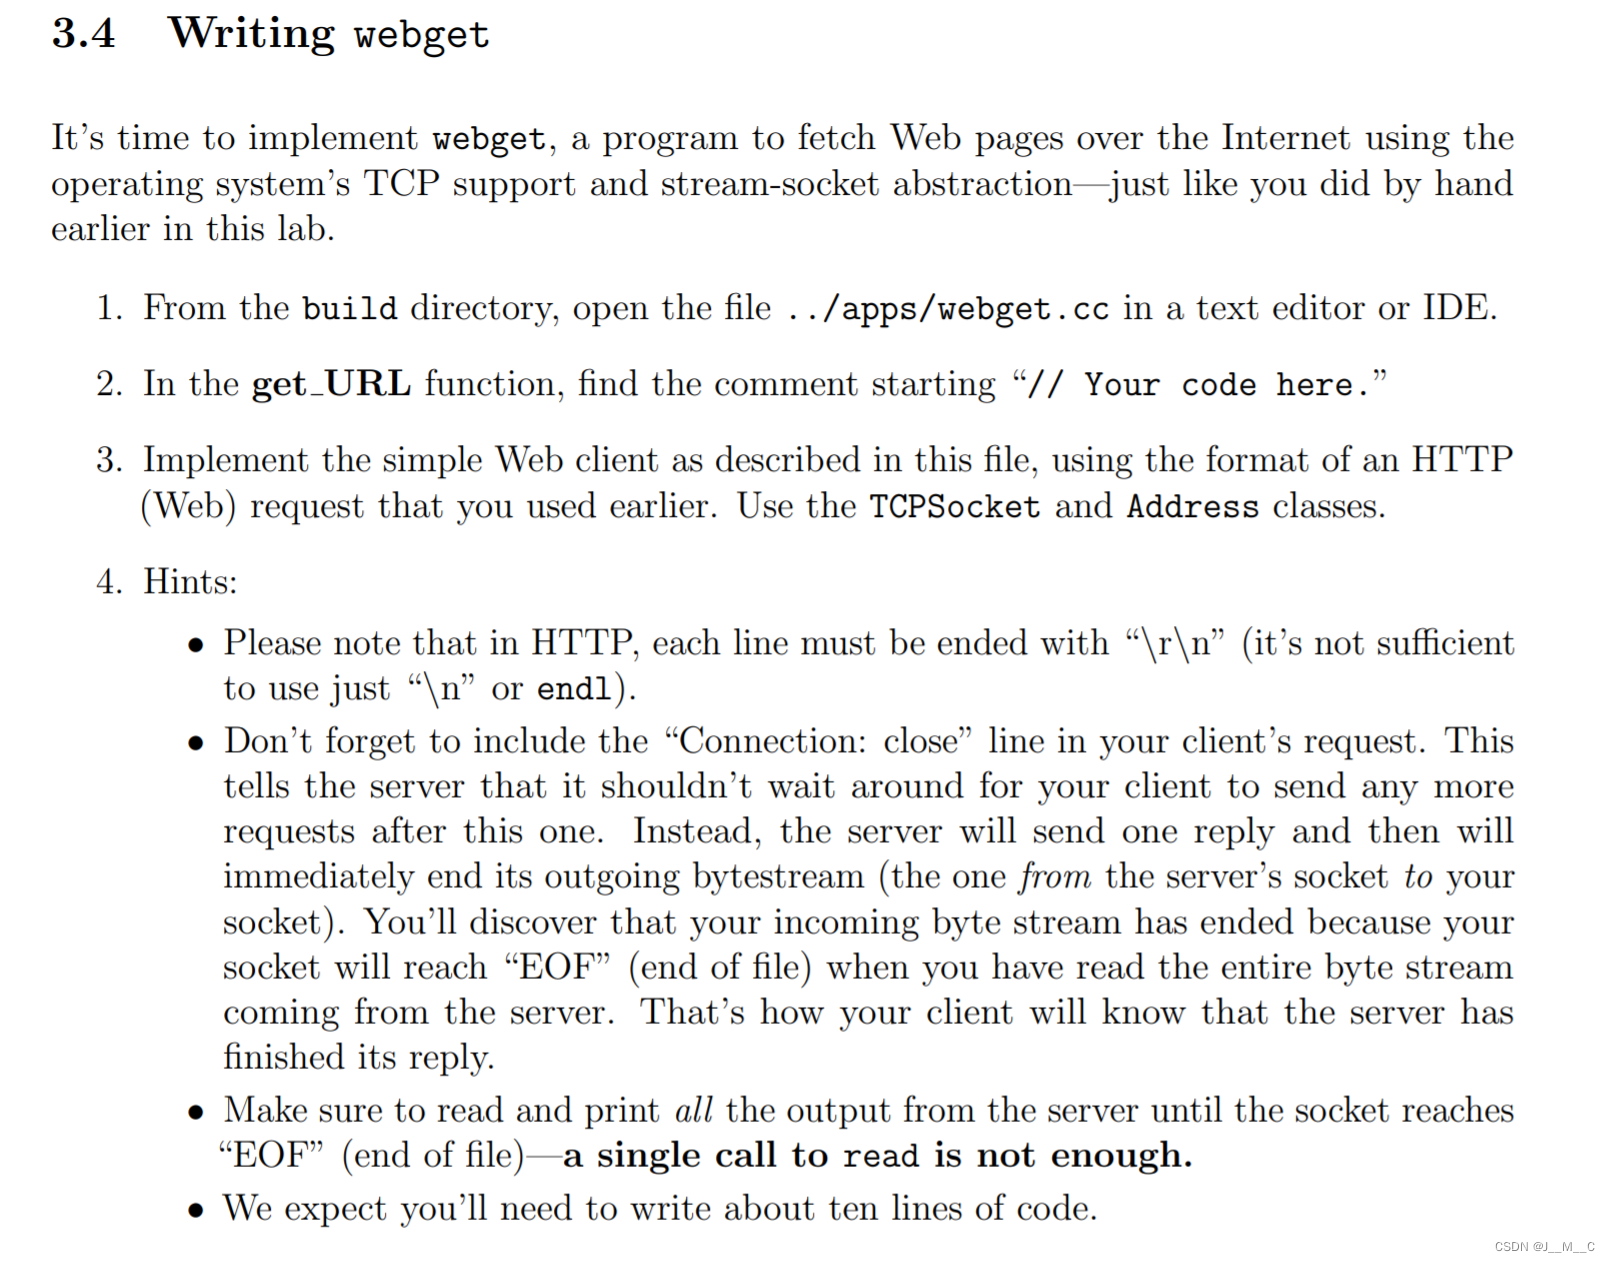
首先实现这个getURL,

其中注意发请求的时候要用\r\n,单纯\n是不够的,此外今年的FileDescriptor::read由直接返回读取的数据改成了传个string引用进去,我分析这么改的原因是为了与新的FileDescriptor::read( vector& buffers )这个写入多值的函数形成API形式上的统一吧,不过这写着就丑陋一些了。
void get_URL( const string& host, const string& path )
{
  TCPSocket sock;
  sock.connect( Address( host, "http" ) );
  sock.write("GET " + path + " HTTP/1.1\r\n"    // 请求行
             "Host: " + host + "\r\n"           // 告知服务器主机名
             "Connection: close\r\n"            // 通知服务器关闭连接
             "\r\n");                           // 空行
  sock.shutdown( SHUT_WR ); // 关闭写端
  while ( !sock.eof() ) {   // 读取所有数据
    string tmp;
    sock.read( tmp );
    cout
protected:
  enum State { CLOSED, ERROR };
  uint64_t capacity_;
  uint64_t bytes_pushed_ {}; // 已写入的字节数
  uint64_t bytes_popped_ {}; // 已弹出的字节数
  unsigned char flag {};	// 0: normal, 1: closed, 2: error
  std::queue};
  std::string_view buffer_view {};
public:
  explicit ByteStream( uint64_t capacity );
  // 提供ByteStream的 reader 和 writer 接口的辅助函数
  Reader& reader();
  const Reader& reader() const;
  Writer& writer();
  const Writer& writer() const;
};
class Writer : public ByteStream
{
public:
  void push( std::string data ) noexcept; // 在可用容量允许的范围内向流中写入数据
  void close() noexcept; // 关闭流,不允许再向流中写入数据
  void set_error() noexcept; // 流中出现错误,置位错误标志
  bool is_closed() const noexcept;      // 判断流是否已关闭
  uint64_t available_capacity() const noexcept; // 计算流中剩余可用容量
  uint64_t bytes_pushed() const noexcept;       // 计算流中已写入的字节数
};
class Reader : public ByteStream
{
public:
  std::string_view peek() const noexcept; // 返回流中下一个数据块的只读视图
  void pop( uint64_t len ) noexcept;      // 从流中弹出指定长度的数据块
  bool is_finished() const noexcept; // 判断流是否已关闭且所有数据块都已弹出
  bool has_error() const noexcept;   // 判断流是否出现错误
  uint64_t bytes_buffered() const noexcept; // 计算当前流中剩余的字节数
  uint64_t bytes_popped() const noexcept;   // 计算流中已弹出的字节数
};
/*
 * read: A (provided) helper function thats peeks and pops up to `len` bytes
 * from a ByteStream Reader into a string;
 */
void read( Reader& reader, uint64_t len, std::string& out );
}
void Writer::push( string data ) noexcept
{
  auto len = min( data.size(), available_capacity() );	// 确定可写入的数据长度
  if ( len == 0 ) { // 如果可写入的数据长度为0,说明已经写满了,返回
    return;
  } else if ( len
文章版权声明:除非注明,否则均为主机测评原创文章,转载或复制请以超链接形式并注明出处。
Lab 0:networking warmup(环境搭建 & webget & bytestream),词库加载错误:未能找到文件“C:\Users\Administrator\Desktop\火车头9.8破解版\Configuration\Dict_Stopwords.txt”。,使用,我们,安装,第3张")


 函数的指针数组形参是怎么回事?")
还没有评论,来说两句吧...